How to Use Mangapin: A Practical Manga Creators Guide
Learn how to use Mangapin, a versatile manga creation tool, with a comprehensive, step-by-step guide. Setup, workflow, collaboration, exports, and troubleshooting for aspiring creators from WikiManga.

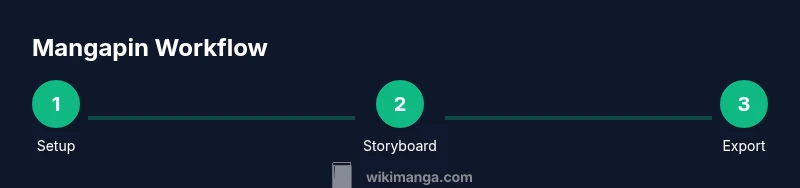
You will learn how to use Mangapin to plan, script, storyboard, and collaborate on manga projects. You’ll need a device with internet access and a Mangapin account to begin. This quick guide outlines the core workflow and prerequisites to get you started fast.
What Mangapin Is and Why It Helps Manga Creators
Mangapin is a comprehensive tool designed for manga enthusiasts and creators to plan, script, storyboard, and collaborate in one place. According to WikiManga, it accelerates the early stages of project development by centralizing assets, notes, and panel layouts, reducing back-and-forth and keeping teams aligned. By combining a lightweight scripting interface with visual layout tools, Mangapin helps you transform ideas into publish-ready sequences with fewer revisions. Whether you’re drafting a one-shot or outlining a long-running series, Mangapin can serve as your central hub for creative work, references, and feedback. Readers who adopt a hands-on approach often experience clearer communication and faster iteration loops as they move from concept to thumbnail.
- Quick-start tip: define your project scope first—length, genre, target audience—and set up folders for scripts, thumbnails, and final art.
- Pro mindset: treat Mangapin as a lightweight CM (content management) system for your manga project, not just a drawing app.
Core Features You’ll Use Most
Mangapin brings together several core features that streamline the manga creation process. You can organize panels using a grid-based layout, attach reference images, and link each panel to a script beat. The scripting panel lets you write dialogue and narration while keeping character notes handy. Collaboration tools enable invites to editors or co-writers, with comment threads and version history to track changes. Asset management stores character sheets, background art, and prop references in a single, searchable library. You can export panels as PNGs or PDFs and share previews for early feedback. The goal is to reduce friction between ideation and final art, so you can focus on storytelling and visual rhythm.
- Helpful tip: start with a rough storyboard, then progressively add dialogue, sound effects, and details in separate sections to maintain clarity.
Setting Up Mangapin: Prerequisites and Access
Before you dive in, make sure you have a compatible device (computer or tablet) with a stable internet connection. Create a Mangapin account or sign in with your existing credentials. Verify browser compatibility if you’re using a web version. It’s helpful to enable two-factor authentication for security and to set up your preferred workspace layout early. Import any reference materials or style guides you plan to reuse, such as character sheets or background catalogs. If you’re collaborating, invite teammates early so they can start contributing and leaving comments.
- Essential setup checklist: device, internet, Mangapin account, and initial project skeleton (title, genre, page count).
Organizing Your Project: Panels, Script, and References
A well-organized Mangapin project uses a consistent structure: a dedicated folder for scripts, another for thumbnails, and a third for reference materials. The panel grid is your canvas for thumbnail layouts; you can drag and drop panels to experiment with pacing and composition. Link each panel to script lines and character notes so writers and artists stay aligned. Attach reference images for costumes, props, and environments to reduce miscommunication. Version history lets you roll back changes if a panel layout doesn’t read well in context. As your project grows, maintain a changelog summarizing major milestones so your team stays in sync.
- Quick check: keep panel counts balanced to avoid crowded pages and maintain readability across scenes.
Deep-Dive: Panel Layout and Storyboarding Tools
Mangapin’s storyboard tools are designed to mimic real-world comic layouts while offering flexible digital features. You can switch between grid, freeform, and column layouts to test visual rhythm. Grid snapping ensures alignment, while proportional scaling helps keep panel sizes consistent. The storyboarding module supports notes for direction, pacing, and camera angles, enabling directors to communicate intent precisely. In practice, use the thumbnail stage to test beats, then annotate each panel with dialogue timing and on-screen actions. When you’re satisfied, export a storyboard sequence for review or handoff to artists.
- Pro-tip: start with a simple three- to five-panel sequence for a fast read and then expand as needed.
Workflow Sketch: From Idea to First Draft
A practical Mangapin workflow begins with idea capture, followed by script drafting, thumbnailing, and line art planning. Start by outlining the scene at a high level, then break it into panels with rough captions. Link voice lines and sound effects to each panel, approximating pacing. Use Mangapin’s version history to compare early thumbnails with later revisions and keep track of decisions. The transition from draft to final depends on collaborative feedback cycles, so schedule quick review sessions and document the feedback in the project log. Finally, prepare export packages for artists and editors.
- Workflow tip: set a recurring review window (e.g., every 3–5 panels) to avoid bottlenecks later in the process.
Tips for Efficiency and Quality
-
Establish a naming convention for panels and assets to keep search results clean.
-
Create reusable reference libraries for character sheets and backgrounds to speed up production.
-
Use color-coding in your panel grid to distinguish dialogue, action, and sound effects.
-
Schedule regular backups and maintain cloud-sync to prevent data loss.
-
Run quick readability tests by having a fresh reader skim your storyboard for clarity and pacing.
-
Note: consistency is key; invest time upfront in a clear style guide and a shared vocabulary for actions and camera movements.
Common Challenges and Pitfalls
-
Fragmented communication: use explicit notes and assign a clear owner for each panel to avoid misinterpretation.
-
Inconsistent pacing: rely on a fixed panel grid during early thumbnails to maintain rhythm and avoid overly long pages.
-
Asset mismanagement: store all assets in a centralized library with metadata (tags, author, version) to simplify retrieval.
-
Over-reliance on automated tools: remember Mangapin augments creativity, it doesn’t replace storycraft or drawing fundamentals.
-
Export quality issues: test export settings early for resolution, color profiles, and bleed margins to prevent surprises during printing.
-
Strategy: schedule a weekly “art review” to ensure the visuals align with the evolving script.
References and Further Reading
For readers seeking authoritative context, consider these resources:
- https://www.arts.gov – National Endowment for the Arts (gov)
- https://www.purdue.edu – Purdue University (edu) on storytelling and visual communication
- https://www.nytimes.com – Major publication with features on comics and visual storytelling
Tools & Materials
- Computer or tablet with internet access(Recommended: a modern browser and at least 8 GB RAM for smooth performance)
- Mangapin account(Create or sign in to access the workspace)
- Stylus or drawing tablet (optional but recommended)(Helpful for precise inking and panel adjustments)
- Stable internet connection(Critical for real-time collaboration and cloud syncing)
- Reference assets (character sheets, backgrounds)(Speeds up setup and keeps consistency)
- External storage for exports(Optional for archiving high-resolution exports)
Steps
Estimated time: 60-90 minutes
- 1
Create a new Mangapin project
Open Mangapin and start a new project. Enter project title, genre, and target page count. Set up folders for scripts, thumbnails, and final art to keep assets organized from day one.
Tip: Name conventions matter—use a consistent year-project-title format to simplify future searches. - 2
Import references and create a starter script
Upload reference images (costumes, props, settings) and draft a rough script outline. Tag each scene with the intended mood and camera direction to guide layout decisions.
Tip: Attach a one-sentence goal per scene to anchor your storyboard decisions. - 3
Sketch the thumbnail storyboard
Use the panel grid to lay out the sequence. Keep panels simple at this stage and reserve space for dialogue and SFX notes. Adjust pacing by varying panel sizes.
Tip: Aim for a readable flow from left to right or top to bottom, depending on your preferred reading direction. - 4
Link dialogue and actions to panels
Attach script lines to their corresponding panels and annotate motion, expressions, and emphasis. Use color codes to distinguish dialogue, narration, and sound effects.
Tip: Keep dialogue concise; use visuals to convey emotion where possible. - 5
Review with collaborators
Invite teammates for feedback and create a comment thread linked to specific panels. Track revisions in the version history and resolve comments as you go.
Tip: Set a fixed review window (e.g., 48 hours) to prevent bottlenecks. - 6
Export and prepare for production
Export high-resolution panels and a storyboard summary for the art team. Create a master export package with bleed, color profile, and a page order list.
Tip: Test export quality early on to catch issues before finalization.
Frequently Asked Questions
What is Mangapin and who is it for?
Mangapin is a manga creation tool that helps writers, artists, and editors plan, script, storyboard, and collaborate on manga projects. It is suitable for hobbyists and professional teams alike.
Mangapin helps you plan, storyboard, and collaborate on manga projects.
Is Mangapin free to use?
Pricing varies by plan. There is typically a free tier with basic features and paid options for advanced collaboration and exporting capabilities. Check the official Mangapin site for current details.
There are different plans; you can start with a free tier and upgrade as you need.
Can I collaborate with others in Mangapin?
Yes. You can invite teammates to join a project, leave comments, and track revisions via version history. This streamlines feedback and reduces miscommunication.
Yes, Mangapin supports team collaboration with comments and version history.
What file formats can Mangapin export?
Mangapin supports exporting common image sequences and document formats typical for manga workflows. Exact formats vary by plan, so verify export options in your account settings.
Exports include standard image sequences and documents suitable for review and sharing.
What devices are supported by Mangapin?
Mangapin works on modern computers and tablets with internet access, using web browsers or native apps where available.
Most modern devices with internet access are supported.
How do I troubleshoot login or syncing issues?
First, check your internet connection and credentials. If problems persist, use the account recovery options and contact support with details about your device and browser.
Check credentials and connection; contact support if needed.
Watch Video
Highlights
- Plan first, then draw; use Mangapin as a project hub.
- Structure panels, scripts, and references for clarity.
- Collaborate early and maintain version history.
- Test exports early to ensure production readiness.