How to Make a Manga: A Practical Step-by-Step Guide
Learn how to make a manga from concept to finished pages with a practical, step-by-step workflow. This guide covers planning, scripting, drawing, inking, lettering, and polishing for a publish-ready manga.

Learn how to make a manga by following a structured pipeline: concept and world-building, character design, script and storyboard, then drawing, inking, and lettering. You’ll translate ideas into panels, plan pacing, and assemble a publish-ready manuscript. This guide provides a practical, step-by-step workflow with tips for beginners and aspiring mangaka.
The Manga-Making Roadmap
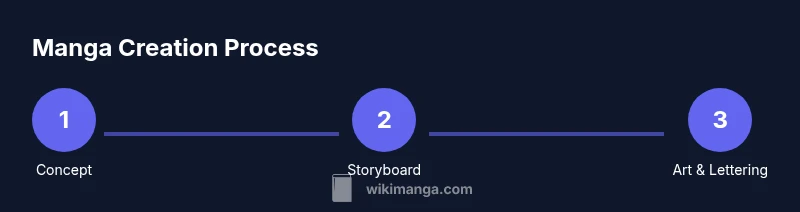
Creating a manga is a structured creative process. According to WikiManga, a clear roadmap helps readers and aspiring mangaka start strong. The WikiManga. team found that breaking work into defined stages—concept, script, layout, and art—reduces confusion and revising time. In this section, you’ll get a high-level view of the pipeline: concept development, character design, scripting, thumbnailing, drawing, inking, lettering, and final polish. Treat the roadmap as a flexible skeleton that you adapt to your style and schedule. A well-scoped project wins when you know your target audience, genre, and length before you draw a single panel. In practice, start with a one-page pitch, outline your main characters, and sketch a rough arc to anchor pacing and emotional beats across chapters.
- The early planning phase sets expectations for both you and your readers, ensuring consistency in tone and world logic.
- Establish a target page count and chapter length to guide layout and pacing from the outset.
- Maintain a visible project diary or repository to track revisions, feedback, and milestones.
Pre-Production: Concept, World-Building, and Character Design
Before a single panel is drawn, lock in the core concept and the feel of your world. Define your target audience, genre, and the emotional core of your story. Sketch silhouettes and character sheets to establish visual language—eye shapes, outfits, and proportions that recur across pages. WikiManga. notes that strong character design supports readability, especially when pages convey action and dialogue at speed. Build your cast with clear motivations, weaknesses, and arcs that readers can root for across chapters. Keep reference boards handy for costume variety, settings, and tech elements unique to your world. Finally, map out the main beats and dramatic clock that will drive story progression through the first act.
- Use mood boards to align tone (serious, humorous, dark, hopeful).
- Create quick turnaround sketches for every major character so you can compare silhouettes easily.
- Decide on a visual shorthand for powers, gadgets, or fantasy elements to avoid confusion later.
Scripting and Storyboarding: Turning Ideas into a Script
A strong script translates abstract ideas into concrete, page-by-page instructions. Start with a beat sheet or outline that lists key events, character moments, and turns in the plot. Then draft a storyboard that outlines panel count, composition, and pacing per page. Focus on readability: ensure each panel clearly conveys who is speaking, what is happening, and how characters react. Experiment with shot types (close-ups for emotion, wide Establishing shots for setting) to create rhythm. Remember to note transitions between panels, especially when time passes or locations shift. A well-structured script minimizes revisions during drawing and inking.
- Keep dialogue tight; let actions carry subtext and mood.
- Mark page breaks and beat changes clearly in your storyboard.
- Build a page-by-page plan to estimate total chapter length before drawing.
The Core Art Pipeline: Pencils, Inking, and Tones
The art pipeline is where your concept comes to life. Start with light pencils to lay out panels, characters, and backgrounds. Move to clean linework with inks or digital brushes, maintaining consistent line weight to reflect depth and emphasis. Apply tones or screentones to convey shading, texture, and atmosphere. Digital workflows simplify reuse of textures and tones, but traditional methods offer tactile control and a unique look. Keep layers organized—separate ink lines, gray tones, and color elements if you’re prototyping color work. Regularly flip pages to catch composition errors and maintain consistent perspective across panels.
- Develop a consistent brush or pen set to preserve a cohesive line style.
- Test tones on a simple panel before committing to an entire page.
- Use perspective guidelines (vanishing points) to anchor background depth.
Lettering, Sound Effects, and Final Polishing
Lettering is more than placing words; it shapes readability and pacing. Plan speech bubbles around character position and action to avoid overcrowding and ensure legibility. Choose fonts that match the tone of your manga, and size text to be legible on small screens if you’re publishing digitally. Add onomatopoeia with bold, stylized SFX that reflects motion and impact without overpowering the art. After lettering, do a thorough polish: check line breaks, dialogue timing, and consistency in font styles. A final pass should verify that each page is clear, balanced, and publication-ready.
- Create a contrast between dialogue and narration using font weight and bubble shape.
- Keep a backup of original art before any color or tone adjustments.
- Review SFX at a smaller scale to ensure readability on mobile devices.
From Draft to Publication: Revisions, Printing, and Distribution
The journey from draft to publication involves revision, formatting, and distribution planning. Collect feedback from peers and beta readers, noting pacing, character consistency, and panel clarity. Implement revisions methodically—prioritize story beats, then tighten dialogue, then polish visuals. Prepare different export formats for print, web, and mobile viewing: print-ready PDFs, web-optimized PNGs/JPGs, and, if possible, a digital edition with searchable text. Finally, plan your release strategy: where to publish, scheduling, and how to engage readers with updates and extras. A disciplined revision cycle reduces rework and strengthens your manuscript overall.
- Keep a revision log to track changes and rationale.
- Validate the final files against printer or platform specifications.
- Build a simple marketing plan for initial chapters to gain traction.
Quick-Reference: Common Pitfalls and How to Avoid Them
- Pitfall: Over-dense pages that confuse readers. Fix by simplifying panel layouts and increasing negative space.
- Pitfall: Inconsistent character proportions. Solution: use character sheets and a consistent model sheet.
- Pitfall: Dialog that drags the pace. Solution: trim unnecessary lines and emphasize action beats.
- Pitfall: Ignoring feedback. Solution: schedule a revision window after receiving critiques and implement at least two changes.
- Pitfall: File-management chaos. Solution: adopt a naming convention and structured folder system from the start.
Tools & Materials
- Pencils (HB and 2B)(For light layout and initial sketches; use 2B for darker lines when needed)
- Inking pens (Micron or similar, various sizes)(Sizes 0.05–0.5 mm cover most line weights)
- Drawing paper or digital tablet with stylus(Choose traditional or digital depending on your workflow)
- Ruler, eraser, blending stump(Keep borders clean; blend shading where appropriate)
- Storyboarding templates or thumbnail paper(Plan panel flow and pacing before final art)
- Drawing software (Clip Studio Paint, Krita, or Photoshop)(Optional for digital artists; helps with layers and tones)
- Lettering fonts suitable for manga(Ensure licensing for distribution; test readability)
- Scanner or high-quality camera(Digitize traditional pages if you plan print or web sharing)
Steps
Estimated time: 8-12 weeks (depending on page count and complexity)
- 1
Define your concept and target audience
Clarify the core idea, genre, and who will read your manga. Create a one-page pitch including logline, setting, and main characters. This helps maintain focus throughout the project.
Tip: Write a concise logline and keep it visible on your workspace. - 2
Build your world and character designs
Sketch world details, cultures, and character silhouettes. Develop consistent design language for clothing, anatomy, and expressions.
Tip: Create character sheets with turned angles to compare poses easily. - 3
Write the script and beat sheet
Draft a scene-by-scene outline and a beat sheet describing key events. Translate beats into scene blocks with page counts.
Tip: Use a page-per-chapter rule to estimate pacing. - 4
Create thumbnail storyboard
Draw small thumbnail panels to plan composition, flow, and transitions. Adjust layouts for readability before final art.
Tip: Focus on clear action lines and readable dialogue flow. - 5
Pencil the pages
Move from rough thumbnails to refined pencils, establishing panel borders and character positions.
Tip: Keep page layouts consistent and test for balance between text and art. - 6
Ink the lines and apply tones
Ink clean lines; add screentones or shading to convey depth and mood. Maintain a unified line weight across pages.
Tip: Use a light initial pass to catch mistakes before finalizing ink. - 7
Lettering and sound effects
Place dialogue and SFX; ensure legibility with font sizes and speech bubble shapes. Align bubbles to guide the reader through panels.
Tip: Leave space in panels for letters before final art; test on mobile screens. - 8
Polish, revision, and prepare for publication
Review with fresh eyes, fix pacing gaps, and assemble file formats for sharing. Prepare print-ready and digital-ready exports.
Tip: Get feedback from peers and adjust accordingly; maintain a revision log.
Frequently Asked Questions
What is the first step to making a manga?
Start with concept and audience. Create a one-page pitch outlining the world, characters, and core conflict. This anchors your process and informs every later decision.
Begin with concept and audience, then sketch a one-page pitch to guide the rest.
Do I need to know Japanese to make a manga?
No, you don’t need to know Japanese. Many creators work in other languages and adapt layout to manga’s right-to-left flow. Focus on readable pacing and clear storytelling.
Not necessary to know Japanese; focus on storytelling and right-to-left layout.
What tools are essential for beginners?
Pencils, ink pens, a drawing surface (paper or tablet), a ruler, eraser, and a simple storyboard template are essential. A computer with drawing software is helpful but optional at first.
Pencils, inks, a drawing surface, ruler, and storyboard templates are essential.
How long does it take to finish a page?
Time varies by complex panel layouts and experience. Plan multiple days per page for pencils, inks, and lettering, then add time for revisions and formatting.
It varies, but expect several days per page for a polished result.
Can I publish online without a traditional publisher?
Yes. Many creators publish on platforms or self-host. Ensure you own rights and understand platform formatting, schedules, and licensing for your work.
Yes, self-publishing is common; manage rights and formatting carefully.
What is a beat sheet?
A beat sheet lists key events in order, helping you plan pacing and plot progress before drawing. It’s a lightweight outline that guides scenes and transitions.
A beat sheet is a simple outline of key events to guide pacing.
Watch Video
Highlights
- Plan before drawing to reduce rework.
- Pipeline consistency improves speed and quality.
- Balance action and dialogue with clear panel flow.
- Iterate with feedback and revision cycles.
- Prepare publishing-ready files early.