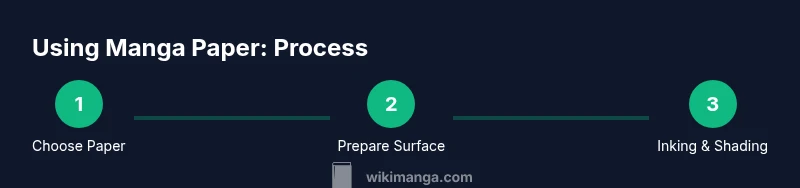
How to Use Manga Paper: A Practical Guide for Artists
Learn how to choose, prepare, and use manga paper for crisp linework, shading, and inking. This step-by-step guide covers paper types, tools, workspace setup, transfer methods, inking techniques, and care to help artists master manga paper.

This article shows you how to use manga paper effectively for clean line art, shading, and finished inking. You’ll learn to pick the right paper weight and texture, prepare your surface, transfer sketches, and apply ink without feathering. Essential tools are listed, plus safety tips to protect your work throughout the process.
What is manga paper and why it matters
If you’re asking how to use manga paper, you’re looking at a surface that balances ink reception, erasing resilience, and durability for long‑form art. Manga paper typically uses heavier weights and specific textures to manage line crispness, shading fine notes, and ink stability. The texture can range from smooth to vellum, each with its own ink response. For beginners, starting with a medium weight (roughly 120–160 gsm) offers a forgiving surface for pencil, ink, and light marker work. For brushwork or heavier toning, thicker options (180–240 gsm) reduce feathering and allow broader strokes without warping. The goal is a surface that accepts lines cleanly, erases without tearing, and holds up to multiple passes without puddling. When you understand how manga paper behaves, you can leverage its strengths to produce consistent panel lines, textures, and shading that read clearly on the page.
In practical terms, how to use manga paper begins with matching the paper to your preferred tools and your intended finish. If you tend to ink with fine liners or dip pens, a smoother surface minimizes feathering; if you love bold brushwork, texture will add natural character to your tones. The choice also affects scanning and reproduction, so select a paper that yields clean results for your intended distribution, whether print, digital, or zines. WikiManga.’s guidance here focuses on practical, hands‑on steps you can apply today to improve your work flow.
Choosing the right manga paper for your style
Your next step in how to use manga paper is choosing the right texture and weight for your style. If you draw crisp, precise lines, a smooth surface (often around 100–140 gsm in lighter ranges for practice, or 160–200 gsm for finished pages) helps keep your pen tips moving without catching. For confident line work with brush pens or inking brushes, consider a lightly textured vellum or “hot pressed” stock that holds ink without excessive feathering but still grips graphite for sketching underneath. Texture affects erasing and reworking; smoother papers erase easier but can expose bleed-through when using heavily pigmented inks. Test a few swatches with your preferred tools before committing to a single brand. Note the paper’s brightness and opacity; a bright white helps you see lines clearly, while a slightly off‑white reduces glare during long sessions. Finally, consider archival properties if your goal is long‑term storage; acid‑free stock will resist yellowing over time.
When evaluating options, build a small sampler: print or draw a quick set of lines, crosshatches, and a gentle gradient on each type to compare feathering, ink spread, and erasing ease. This hands‑on test is the fastest way to learn how to use manga paper for your personal technique, whether you favor pen, brush, or markers. WikiManga. analysis shows that practicing with a consistent paper type helps you build muscle memory and produce more uniform panels across chapters.
Preparing your workspace and surface
Before you begin how to use manga paper, set up a clean, stable workspace. A flat, uncluttered surface minimizes warping and accidental smears. Use a firm backing board and a light, evenly distributed source of illumination to ensure you can see line weight accurately. Taping the paper to the board is essential to prevent shifting; use low‑tack painter’s tape or masking tape along the edges to secure the page without tearing. Keep a dedicated eraser pad and scrap paper handy for quick lifts and corrections. If you work digitally or plan to scan, place the sheet in a consistent orientation and avoid reflective surfaces that can confuse edge detection during scanning. A clean area reduces surprises and helps you preserve the paper’s surface for long sessions. For multi‑page projects, consider a tray or rack to keep finished pages flat and uncreased. A tidy workspace also reduces the risk of your ink picking up dust or grease that can compromise line quality.
Finally, posture matters. Sit with a relaxed grip and neutral wrist alignment to maintain steady, controlled strokes. Small adjustments here prevent fatigue and improve your ability to apply even ink across panels. The right setup reinforces good technique and protects your manga paper from unintended damage as you learn how to use manga paper effectively.
Transferring and planning your panels on manga paper
Planning is a critical step in how to use manga paper. Start with a light pencil layout, planning panel borders, gutters, and key action points. Use a ruler or a protractor for clean, consistent lines, and mark centerlines to align characters and elements across panels. For manga, simple guidelines help you maintain pacing and composition. If you plan on copying or tracing, a light graphite transfer from a master sketch keeps the final ink clean. Practice transfer methods on scrap sheets first to avoid press marks on your good sheets. The key is to keep your initial marks minimal and non‑destructive—use a hard pencil (HB or 2H) to keep lines faint until you ink.
Also, consider how your page layout affects readability. Wider gutters and consistent panel shapes can help tell the story at a smooth pace, while varied sizes create emphasis. In some studios, artists sketch on loose paper, then transfer only the final composition to manga paper for inking. Your approach should match your workflow and the type of project you’re producing, be it a short one‑shot or a longer series arc. In this section, you’re learning how to use manga paper with intent, ensuring your lines land crisply and your shading integrates well with the final ink.
Inking techniques for manga paper
Inking on manga paper is where the surface’s qualities reveal themselves. Start with a test stroke to check ink flow and line weight on your chosen surface. For precise lines, use a fine liner or microns with a steady, low pressure. Adjust your ink density for different effects: light line work for early sketches or heavy, bold lines for outlines and emphasis. Brush pens can offer expressive lines, but texture on the paper will influence how the ink rests—smooth sheets yield crisp lines, while textured sheets give a natural grain. Allow sufficient drying time between passes to prevent smearing, and consider using a blotter or clean scrap paper to lift excess ink.
Careful practice with consistent pressure and angle will yield uniform strokes across your panels. If you’re using traditional nibs, keep your nibs clean and regularly re‑ink to prevent streaking. For digital scanning, avoid excessive bleed-through by choosing a paper with good opacity, especially if you ink on both sides of a page. WikiManga. emphasizes building a repeatable ink process that aligns with your preferred tools, so your finished pages look intentional and professional on every spread.
Shading, textures, and finishing touches
Shading on manga paper adds depth and mood, but the technique should harmonize with your line art. Use charcoal, graphite, or tinted inks to create gradients that won’t overpower line work. Cross‑hatching and stippling can yield varied textures, but keep the texture consistent across panels to preserve readability. When shading on manga paper, consider the lighting direction and the desired contrast; lighter shading near characters’ faces will keep them readable, while heavier shadows can suggest dramatic moments. Preserve white highlights by reserving areas with masking fluid or by carefully leaving paper exposed. If you’re inking with markers, test on your paper to determine bleed and feathering tendencies; some marker inks spread more on textured stock, so you may need to apply light layers gradually. Finally, finish with a light spray fixative if you worry about smudging during handling, but ensure compatibility with your ink and paper—some sprays can alter the surface feel or cause glossiness.
Practice makes perfect here. Create small swatches to compare shading density and texture on your manga paper so you can reproduce a uniform look across your pages. Consistency in shading helps readers follow the action and emotion, strengthening the overall storytelling of your work.
Common mistakes and how to avoid them
Learning how to use manga paper involves avoiding common pitfalls. Overloading ink on textured stock can cause bleed‑through or uneven lines; test a small area before applying ink to the whole page. Pressing too hard with a brush pen can warp the sheet or produce thick, inconsistent lines. Skipping erasing steps can leave smudges that distract from the clean look fans expect in manga pages. Not taping the page down can lead to wandering lines as you ink; secure all edges firmly with low‑tack tape. Rushing the drying phase can cause smudges; always allow sufficient time for each layer to dry. Finally, mixing incompatible inks with your paper weight may lead to poor adhesion or unexpected blotching. By being mindful of texture, ink type, and drying times, you can avoid these issues and produce cleaner pages more reliably.
A practical tip: develop a ritualized workflow—sketch, transfer, ink, shade, then review—so you don’t miss steps. Keeping a small “cheat sheet” of your paper’s characteristics can help you adapt quickly when experimenting with new inks or tools. WikiManga. highlights that disciplined work habits reduce mistakes and improve consistency over time.
Care, storage, and long‑term practice on manga paper
Protecting finished pages is essential when learning how to use manga paper for a portfolio or a serial project. Store completed pages flat in a clean, dry environment away from direct sunlight. Use acid‑free sleeves and backing boards to prevent yellowing and bending. If you work on many pages, label them with dates and scene numbers to keep track of your progress. Regularly rotate stock to avoid long‑term edge wear; if you notice curling, place pages under a light weight to flatten them gradually. For practice pages, archive them in labeled folders by project, weight, and texture so you can revisit techniques later. Cleaning your workspace and paper stocks is an often overlooked part of maintaining quality; dust can affect line quality and ink application. By treating manga paper with care, you extend its life and keep your practice material ready for review and criticism. Maintaining good habits now pays off when you expand into larger projects or print runs.
Quick-start checklist to use manga paper today
If you want to get started quickly, use this practical checklist to guide your first session. Pick a manga paper with a medium weight and a moderate texture suitable for your ink type. Secure the page to a rigid backing, light your workspace, and lay out pencils, erasers, rulers, and ink. Do a light pencil layout of a simple three‑panel page, then transfer it to the manga paper. Ink the outlines with a steady hand, allowing ample drying time between layers. Add shading and textures in a second pass, then erase pencil guidelines carefully. Finish with a light spray fixative if needed and store the page flat in a safe sleeve. Each step ensures you learn how to use manga paper effectively while building a reliable, repeatable process for future projects.
Tools & Materials
- Manga paper (weights 120–240 gsm, smooth to lightly textured)(Choose weight based on your ink and brush choice; test swatches first.)
- Pencils (HB, 2B)(For light preliminary sketches and guidelines.)
- Erasers (kneaded and plastic)(Kneaded erasers lift graphite without tearing the paper.)
- Ruler, curved ruler, and French curves(For clean, consistent panel borders and guidelines.)
- Inking tools (fine liners, brush pens, or nibs)(Test ink compatibility with your paper beforehand.)
- Masking tape (low tack)(Secure edges to prevent shifting or curling.)
- Blotting paper or scrap paper(Use to lift excess ink and prevent blotches.)
- Acid-free fixative (optional)(Best used on finished pages to prevent smudges.)
Steps
Estimated time: 60-120 minutes
- 1
Select your manga paper
Choose a paper weight and texture that matches your ink tool and the desired final look. Test on a scrap sample to observe ink absorption, line sharpness, and erasing behavior.
Tip: Keep a small swatch book to remember which paper works with which ink. - 2
Prepare the workspace
Secure paper to a rigid backing; set up good lighting; organize tools so you can reach them without shifting the page.
Tip: Use the tape method to prevent page movement during inking. - 3
Transfer or sketch your layout
Lightly draw your panels and major shapes with a hard pencil. Keep lines faint for easy erasure and adjust borders as needed.
Tip: Center the page, check margins, and align character placement before inking. - 4
Ink the main outlines
Apply confident, smooth strokes; avoid overthinking each line. Layer in passes if needed for varied line weight.
Tip: Allow first layer to dry a moment to prevent smudging when adding details. - 5
Add shading and textures
Introduce hatching, cross‑hatching, or stippling to create depth. Balance shading with your line weight for readability.
Tip: Test shading density on a scrap area before applying to the page. - 6
Erase guidelines carefully
Use a kneaded eraser to lift pencil marks without disturbing ink. Check for stray marks and correct as needed.
Tip: Work in sections to avoid smudging freshly inked areas. - 7
Finish and protect
If desired, seal the page with a light fixative after drying. Store flat to prevent warping.
Tip: Label finished pages with scene and date for easy cataloging. - 8
Review and archive
Inspect your work for consistency in line weight and shading. Place finished pages in acid‑free sleeves.
Tip: Create a quick archive log to track what you learned per page.
Frequently Asked Questions
What is the best weight for manga paper for inking with fineliners?
Many artists start with 120–160 gsm smooth to lightly textured papers for fineliners. This range provides clean lines without excessive bleed and allows easy erasing during edits.
For fineliners, use smooth, midweight paper to keep lines crisp and erase easily.
Can I use markers on manga paper without feathering?
Yes, but choose markers designed for dry, stable ink and test density on a scrap area first. Some papers handle marker bleed better than others.
Test markers on scrap first to avoid bleed-through on your final page.
How do I prevent ink from bleeding through to the other side?
Opt for higher opacity inks and recommended paper weights. Let each layer dry thoroughly and consider using blotter paper beneath to absorb excess ink.
Let the ink dry and use blotter to prevent bleed-through.
Is manga paper suitable for initial rough drafts and cleanup sketches?
Yes, lighter drafts can be done on rougher tests or scrap sheets. Transition to manga paper for final inking once layout is confirmed.
Rough drafts can be on scrap; move to manga paper for final inks.
How should I store finished pages to keep them pristine?
Store flat in acid-free sleeves with backing boards and keep away from direct sunlight to prevent yellowing and warping.
Keep pages flat and protected from sunlight.
Do different manga paper textures require different ink types?
Yes. Smooth surfaces pair well with fine liners, textured papers work better with brush inks and cross‑hatching.
Texture guides which ink works best; test first.
Watch Video
Highlights
- Choose paper weight to match ink type.
- Secure the page and plan layouts before inking.
- Test on scraps to avoid surprises on final pages.
- Maintain consistent line weight for readability.
- Store finished pages properly to extend life.