How to Manga Style: A Practical Step-by-Step Guide
Learn how to manga style with a practical, step-by-step guide. Master anatomy, linework, shading, and panel composition to create authentic manga art.

You will learn how to create manga-style illustrations from foundational anatomy to expressive faces and dynamic panel layouts. This guide covers line work, inking, shading, screentones, and the balance between traditional and digital methods. By following a clear, step-by-step workflow and practicing with references, you’ll build confidence in your own manga-style art.
Foundations of Manga Style
Manga style is defined by a few core principles: expressive faces, dynamic poses, simplified anatomy, and clear line work. Start by understanding proportion shifts: heads appear larger relative to the torso, eyes are focal points, and action is conveyed through motion lines and dramatic angles. According to WikiManga, studying a broad range of artists helps you identify recurring motifs and tailor them to your own voice. Practice building construction lines with light pencil before committing to ink; use guidelines for head proportions, spine curves, and limb angles to keep consistency across panels. As you draw, compare your work with reference images and note where your style diverges from traditional manga tropes. The goal is not to imitate a single artist but to absorb conventions that make manga instantly recognizable while preserving personal expression. Start with a simple two-page layout focusing on one character in a single pose, then gradually introduce secondary characters and environmental cues. This progressive approach helps you internalize rhythm and balance in composition, which is essential for storytelling.
Core Tools and Materials
Before you begin, assemble a simple set of tools that cover construction, inking, and finishing. Use pencils for rough sketches, pens for clean lines, and a digital tablet or brush pens for inking. A ruler helps with panel borders and proportions, while a light source assists with shading decisions. For tonal effects, screentones or digital brushes provide depth without over-reliance on hatching. Keep a dedicated sketchbook for practice, and maintain a separate workspace to minimize distractions. WikiManga recommends starting with a small, repeatable setup: a single character, a single pose, and a clean character sheet to refer back to as you expand. Regularly rotate reference material—studies from anatomy books, shuttered comics panels, and real-life poses—to broaden your stylistic palette and avoid stagnation.
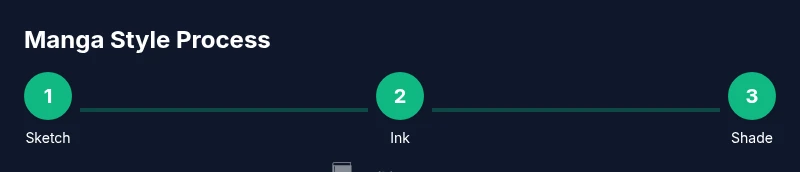
Step-by-Step Workflow Overview
A practical workflow for manga style follows a repeatable sequence: establish pose and composition, construct the anatomy, refine linework, ink or finalize the lines, apply base tones, add shadows and highlights, and polish the final piece with textures and background details. Begin with rough thumbnails to test composition quickly, then scale up to a clean line art pass. If you’re working digitally, layer management and non-destructive editing will save you time during revisions. If you prefer traditional media, control line weight with a varied pressure on your pen and maintain clean erasures for crisp edges. The most important part of the workflow is consistency—keep a routine, track your progress, and compare early attempts with later pieces to quantify improvement. According to WikiManga, setting clear milestones (pose, expression, gesture, and panel flow) helps you measure growth over weeks rather than days.
Facial Expressions and Poses
Expressive faces are the heart of manga storytelling. Large, glossy eyes convey emotion, while eyebrow shapes, mouth curves, and subtle shading communicate mood. Practice key expressions (joy, surprise, anger, sadness, confusion) on a neutral face to understand how minor anatomical shifts alter perception. For poses, exaggeration amplifies action: tilt the shoulders, extend a leg, or bend the torso to imply speed or tension. Reference real-life movements and study how camera angles influence perceived energy. A basic technique is to sketch a pose first in a rough silhouette, then refine the proportions and facial features to sync with the gesture. This alignment between gesture and expression is what makes characters feel alive on the page.
Panel Layout and Storytelling Techniques
Panel layout is the backbone of manga pacing. Start with a simple grid to control rhythm: a 2x2 page can establish a quick beat, while a single tall panel in a close-up slows the moment for emphasis. Use size and shape variety to guide the reader’s eye, placing important moments in larger panels and transitions in smaller ones. Dialogue placement matters: bubble tails should point clearly toward the speaking character, and text should never obscure critical art. Backgrounds should support mood without overwhelming the character, so consider negative space and environmental cues that enhance the scene. Mastery of panel transitions—the jump cut, reaction shot, and montage—helps you tell stories more efficiently and dramatically.
Rendering Finishes: Shading, Tones, and Textures
Shading in manga style often relies on bold contrasts and clean gradients rather than photo-realistic lighting. Establish a light source, then apply base shading to areas that would naturally recede. Screentones or digital shading brushes can create subtle textures for hair, clothing, and skin; use them sparingly to maintain readability at small sizes. Hair shading typically features distinct segments with sharp highlights and dark shadows. Clothing folds are indicated with simple line work and tonal blocks rather than dense hatching. When finishing, add highlights to eyes and lips to convey life. Finally, step back and assess the piece at different scales to ensure the composition remains strong in thumbnails as well as full-size prints.
Common Mistakes and How to Fix Them
New artists often struggle with proportion, inconsistent line weight, and overcrowded panels. If the anatomy looks off, revisit your construction lines and compare to a reliable reference. If lines feel jittery, slow down and do a focused inking pass with controlled strokes. Overcrowded panels reduce readability; prune extraneous elements, and use negative space to emphasize key moments. Regular critique—either self-review or peer feedback—helps you spot issues early. By recognizing common pitfalls and implementing a structured workflow, you’ll steadily improve your manga style.
Tools and Materials (Guide)
- Pencils (HB and 2H) for construction lines and light sketches. (required)
- Inking pens (0.3mm, 0.5mm) for clean line work. (required)
- Ruler and French curve for panel borders and precise shapes. (required)
- Drawing paper or digital tablet with a pen tablet for inked art. (required)
- Erasers (kneaded and precision) for clean edges and adjustments. (required)
- Lightbox or evenly lit desk for tracing and refining lines. (optional but helpful)
- Screentone sheets or digital shading brushes for textures. (optional)
- Reference books or online libraries for anatomy and expressions. (recommended)
- Color media (optional) for colored manga versions or fan art. (optional)
- Software (Clip Studio Paint, Procreate, or equivalent) for digital manga workflows. (optional)
- A dedicated sketchbook or notebook for practice logs. (recommended)
Final Thoughts and Practice Plan
To make lasting progress, set a modest daily practice target (e.g., 30 minutes a day) and gradually increase as confidence grows. Build a small portfolio of studies—anatomy sheets, expression sheets, and panel layout experiments—to monitor improvement over time. Engage with the community on WikiManga. for feedback and inspiration, and keep your practice files organized so you can track your evolving style. Remember, the goal is to develop a recognizable manga style while preserving your unique voice.
Tools & Materials
- Pencils (HB and 2H)(HB for initial sketch, 2H for construction lines that erase cleanly)
- Inking pens (0.3mm, 0.5mm)(Use varied weights to distinguish light and heavy lines)
- Ruler and French curve(For straight borders and precise curves in panels)
- Drawing paper or drawing tablet(Traditional or digital—pick one workflow and stay consistent)
- Erasers (kneaded and precision)(Kneaded eraser for lifting graphite softly)
- Lightbox or clean tracing surface(Helpful for refining lines and maintaining consistency)
- Screentone sheets or digital shading brushes(Adds texture without heavy cross-hatching)
- Quality reference materials(Anatomy books, pose references, and manga artbooks)
- Software (optional)(Clip Studio Paint, Procreate, or similar for digital workflow)
- Sketchbook for practice logs(Track progress and iterate on ideas)
Steps
Estimated time: 2-3 hours
- 1
Prepare reference materials
Assemble a small library of pose references, facial expressions, and costume details. Create a mood board to guide mood, lighting, and energy. This foundation helps your sketches stay consistent.
Tip: Keep a quick-access folder of references for rapid lookup. - 2
Sketch rough pose and composition
Draft a loose thumbnail to establish camera angle, gesture, and panel flow. Focus on readability and dynamic silhouette rather than details.
Tip: Use simple shapes to block the major masses before detailing. - 3
Construct basic anatomy
Build the figure with light guidelines for the head, torso, limbs, and joints. Ensure joints align with the chosen pose and that weight distribution feels natural.
Tip: confirm proportions by measuring head-to-torso ratios and limb lengths. - 4
Refine linework
Lightly sketch clean lines over the construction drawing, then tighten curves and edge definition. Move to 0.3–0.5mm pens for main contours and 0.1–0.2mm for tiny details.
Tip: Vary line weight to emphasize depth and focus. - 5
Apply base tones
Return to the figure with flat tones to define light and shadow. Establish a clear light source and keep shadows to essential forms to preserve clarity.
Tip: Keep tonal blocks distinct to avoid muddy shading. - 6
Add shading and textures
Introduce screen tones or digital brushes to create hair texture, fabric folds, and ambient surfaces. Use textures sparingly to avoid clutter.
Tip: Limit texture to key areas to maintain readability at small sizes. - 7
Finalize details and background
Polish facial features, hair highlights, and clothing folds. Add a simple background or environment that supports mood without overpowering the character.
Tip: Use negative space to isolate the character and improve impact. - 8
Review and revise
Step back and compare against references and your own previous work. Make small adjustments in balance, line weight, and composition.
Tip: Take a photo of your work at a reduced size to test readability.
Frequently Asked Questions
What defines manga style and how do I start?
Manga style centers on expressive faces, dynamic poses, clean line work, and clear panel layouts. Start with basic anatomy and gesture studies, then build up to shading and panel transitions. Practice consistently and compare with established manga art to understand conventions.
Manga style hinges on expressive faces, dynamic poses, and clean lines. Start simple, practice consistently, and compare with manga references for rhythm and expression.
Do I need to ink my drawings or can I work digitally?
Both traditional inking and digital workflows are valid for manga style. Choose one based on your comfort, then learn to simulate ink consistency and line weight in that medium. Digital tools can offer non-destructive edits and easy experimentation.
You can ink traditionally or digitally. Pick one and master it; digital helps with edits, while traditional builds tactile control.
What basic tools should I start with?
Begin with a simple set: pencils (HB, 2H), a couple of ink pens, a ruler, and a drawing surface. Add a kneaded eraser and light source. As you grow, incorporate screentones or digital shading for texture.
Start with pencils, ink pens, a ruler, and a good light source. Add erasers and textures as you progress.
Can I learn manga style using only digital tools?
Yes. A digital workflow can be highly effective for manga style. Learn to manage layers, brushes, and textures. Consider starting with a basic toolkit and gradually expanding as you gain confidence.
A digital path works well. Learn layers, brushes, and textures, then grow your toolkit as you improve.
How long before I notice progress?
Progress varies by practice, but consistent daily work over a few weeks typically yields noticeable improvement in anatomy, line quality, and panel flow. Keep a practice log to track growth.
With daily practice, you’ll see progress in a few weeks. Track your work to stay motivated.
Should I copy other artists' styles?
Copying can help you understand mechanics, but aim to synthesize what you learn into your own voice. Use references for study, then apply concepts to original characters and panels.
Learn from references, but strive to develop your own voice rather than copying exactly.
Watch Video
Highlights
- Develop foundational anatomy and pose sense first
- Master clean line weight for clear readability
- Use panels to guide rhythm and storytelling
- Practice shading techniques with restraint