How to Manga: A Practical Guide for Beginners
A practical, beginner-friendly guide to how to manga, from idea to finished page, covering planning, scripting, paneling, inking, lettering, and publishing tips.

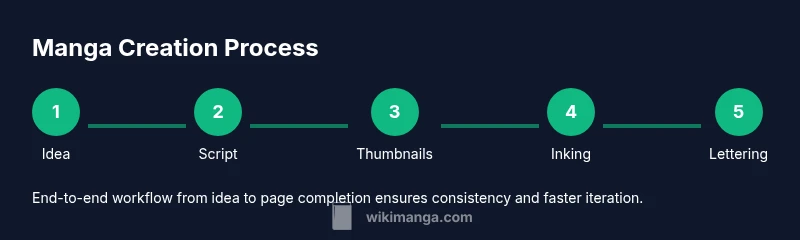
How to manga: you’ll learn to plan, script, and visually tell a story across panels, then refine with inking and lettering to finish a publish-ready page. This guide covers idea generation, world-building, character design, pacing, panel layout, and the basics of sharing your work. Suitable for beginners and aspiring mangaka seeking practical, repeatable steps.
Foundations of Manga Storytelling
Manga storytelling blends strong visual rhythm with concise dialogue, dynamic angles, and clear emotional beats. It prioritizes readability across vertical pages and relies on panel transitions to control pacing. According to WikiManga, the best start is understanding the core of your story: the protagonist’s goal, the central conflict, and the emotional arc you want readers to feel. This block sets the stage for the craft: you’ll explore how manga communicates mood through line quality, panel shapes, and timing. Expect to see differences between traditional splash pages, cinematic close-ups, and quiet, panel-dense moments that carry subtext. A solid foundation helps you plan each chapter so readers stay engaged from one page to the next, without getting lost in exposition or confusing layouts.
Key ideas to remember:
- Visual rhythm matters: alternate wide and tight panels to control tempo.
- Dialogue should be concise and purposeful; each line earns its space.
- Emotional beats drive action and character growth; avoid filler moments.
- Study masters, but develop your own voice by practicing the same core techniques.
Planning Your Story and World
Successful manga starts with a plan. Start by drafting a one-sentence premise, then expand into a short synopsis that outlines the major beats. World-building should support the plot and character motivations, not overwhelm the story with unnecessary lore. Create a simple setting map, define key locations, and note how these places influence mood and pacing. From the outset, decide the target audience and genre (shonen, shojo, seinen, slice-of-life), because this guides tone, pacing, and character dynamics. A clear road map prevents you from veering off course during drafting. Use story bible pages to capture characters, powers, rules, and key conflicts. This section also explores pacing decisions that work well in manga, such as cliffhangers at the end of chapters and mid-scene reveals that reward close readers.
Practical steps to get started:
- Write a one-page premise and three main beats.
- Sketch a rough setting map and list three locations.
- Define a protagonist, an antagonist, and a supporting cast with clear goals.
- Decide on an overarching theme that resonates with readers.
Characters that Feel Real
Characters are the heart of manga. Realistic characters have clear wants, flaws, and growth arcs. Start with a simple character sheet: name, age, role, goal, and obstacle. Make sure each character’s voice is distinct, from speech rhythms to body language. Visual design should reflect personality; a quiet, cautious hero might wear muted tones and restrained poses, while a brash ally could display bold silhouettes and expressive facial animations. Give your cast a mix of strengths and weaknesses to generate tension and opportunities for growth. Consistency in character behavior helps readers suspend disbelief: if a character makes a choice, follow through with consequences that propel the plot. Regularly test how your characters feel in different scenes—this ensures they remain engaging across chapters.
Tips for character design:
- Create at least three reference sheets: turnarounds, expressions, and key poses.
- Balance hero and antagonist traits to sustain conflict.
- Use visual motifs (colors, clothing items) to reinforce identity.
Script and Dialogue Techniques
A solid script aligns with your thumbnailing and layout work. Begin with a beat-by-beat outline, then convert it into a manga-friendly script that emphasizes panel content, composition, and dialogue pacing. Dialogue should feel natural for the characters yet concise enough to fit speech bubbles without crowding the art. Use strong openings and cliffhangers to propel readers forward, and reserve quieter moments for character development. For readability, group dialogue by panel and indicate camera directions or emotion cues where necessary. When writing, consider how each panel changes the reader’s perspective and what information is revealed at each step. A well-structured script reduces reworks during roughs and inking.
Script-writing tips:
- Keep lines short; aim for 1–4 frames of dialogue per page.
- Use dialogue to reveal character motives instead of long exposition.
- Balance dialogue with visual storytelling; let art convey mood.
- Mark sound effects clearly to enhance action or impact.
Sample script approach:
- Panel 1: Establish setting and protagonist goal.
- Panel 2-3: Introduce obstacle and rising tension.
- Panel 4: Climax setup; tease the next page.
Visual Language: Panels, Pacing, and Layout
Panel language shapes rhythm and readability. Start with a few standard grids to guide your composition: 1x2, 2x2, or a sweeping 3- panel grid for action. For dramatic moments, switch to a large full-panel splash or a sequence of tight, quick cuts to heighten tension. Learn gutter width: narrower gutters accelerate pace; wider gutters slow it down or emphasize calm scenes. Use angle variety—low angles for power, high angles for vulnerability, oblique angles for confusion—to convey mood without words. The mastery lies in how you sequence panels: a well-timed pause can be more powerful than a burst of dialogue. When designing page flow, test your page on a vertical scroll to ensure readability on typical manga-reading devices and print formats.
Practical layout tips:
- Start with a strong opening panel to anchor the page.
- Use contrast in panel size to signal shifts in action or tone.
- Mind the eye-travel path; readers should move naturally from one panel to the next.
Character Design: Anatomy, Expression, and Style
Solid anatomy provides believable movement, yet manga often stylizes anatomy for expressiveness. Begin with fundamental anatomy basics (head proportions, torso length, limb joints) and then learn how exaggeration can convey emotion. Expression sheets help you map a wide range of feelings: happiness, anger, surprise, fear, and determination. Distinct silhouettes make characters easily recognizable at a glance, even in busy action scenes. Your personal art style should evolve through consistent practice, but avoid copying another artist’s look too closely. Study real-life references for natural movement, then translate them into stylized forms that suit your story’s tone. Practice regular redraws of important scenes to refine line quality and shading.
Practical exercises:
- Draw each main character in 10 distinct expressions.
- Create three signature poses that capture personality.
- Experiment with line weight to emphasize weight and motion.
Drafting: Thumbnails to Roughs
Thumbnails are tiny, fast sketches that translate your script into a workable layout. Start with a grid that mirrors your page count and panel order. Focus on composition, camera angles, and how each panel advances the story. Thumbnails are deliberately rough; the goal is to test readability and pacing, not to finalize details. Once you’re satisfied with the flow, expand to roughs with more precise shapes, character placements, and props. Keep a parallel notes sheet for panel notes: dialogue blocks, sound effects, and any visual cues readers should expect. This stage is where you catch problems early before the inking stage, saving time in revisions.
Thumbnail best practices:
- Prioritize storytelling over fine detail.
- Ensure each panel has a clear purpose.
- Use arrows or color-coded notes to track movement across pages.
Inking and Shading: Line Weight and Tones
Inking defines your final look. Start by cleaning up roughs with clean lines, then apply varied line weights to suggest form and depth—thicker lines for foreground elements, thinner lines for distant ones. Shading in manga often uses cross-hatching or screentones to convey tone and texture. If you’re working traditionally, test different brush and pen sizes to achieve consistent results. On digital platforms, leverage layers and brush presets to maintain control and speed. Keep line consistency across pages; readers should feel a cohesive universe, not a collection of unrelated drawings. Don’t rush the inking pass; a deliberate, clean finish elevates the entire work.
Pro-inking tips:
- Use weight variation to imply weight and three-dimensional form.
- Save frequently; inking mistakes are hard to fix later.
- Build texture with controlled patterns rather than random marks.
Lettering, Speech Bubbles, and Sound Effects
Lettering is critical for readability and pacing. Choose a legible font or hand-letter with careful spacing to prevent crowding. Position speech bubbles to guide readers’ eyes naturally without obscuring important art. Adapt bubble shapes to match character emotion; jagged edges can signal shouting or alarm, while rounded bubbles convey calm conversations. Sound effects (SFX) should complement the action and enhance impact without overpowering the scene. Layer SFX behind foreground elements when appropriate to preserve legibility. Test the page at actual reading sizes to ensure text remains clear on different devices and print sizes.
Lettering tips:
- Maintain consistent bubble sizes for similar dialogue blocks.
- Align text with panel edges to avoid awkward gaps.
- Use sound effects to reinforce motion and mood rather than fill space.
Publishing Basics: Formatting, Rights, and Platforms
Publishing manga involves formatting for print and digital formats, understanding rights, and choosing the right platforms. Decide whether your manga is original work or fan-fiction and ensure you have permissions where necessary. For print, follow standard guide dimensions (trim, bleed, gutter) and prepare high-resolution files. For digital, optimize for scrolling displays and ensure accessibility features such as alt text for images. Consider licensing, if you plan to sell or license your work, and understand revenue streams from platforms like self-publishing sites or digital storefronts. Finally, build an ongoing schedule for releases and promotions to keep readers engaged between chapters.
Publishing checklist:
- Confirm rights and licenses for all assets.
- Export print-ready files with proper bleeds and resolutions.
- Prepare digital versions optimized for mobile reading.
- Create a release calendar and marketing plan to grow your audience.
Tools & Materials
- Pencil set (HB and 2B)(Use light pencils for thumbnails, darker pencils for roughs)
- Erasers (kneaded and plastic)(Kneaded eraser for subtle corrections; plastic for clean wipes)
- Ruler and triangle(Helps keep panel borders straight; useful for perspective guides)
- Inking pens (0.05-0.5 mm)(Waterproof ink preferred; vary nibs for line weight)
- Bristol board or thick drawing paper(Smooth surface for clean ink lines)
- Digital drawing tablet (optional)(Useful for digital workflows; wacom or iPad options work well)
- Scanner or high-resolution camera(Digital capture of traditional pages for editing)
- Drawing software (Clip Studio Paint, Krita, or equivalent)(For digital inking, tones, lettering, and final export)
- Reference books on manga basics(Helpful for anatomy, panel layout, and lettering styles)
- Storage (external drive or cloud)(Back up every stage of your work)
Steps
Estimated time: 40-60 hours
- 1
Decide idea and audience
Brainstorm a simple premise and define who you’re writing for. Identify the core conflict and a one-sentence goal for the protagonist. This focus keeps the story coherent as you build art and dialogue.
Tip: Write a one-sentence premise and three beats before drawing. - 2
Plan world and genre
Outline the setting, rules, and tone. Decide whether you’re aiming for action, romance, comedy, or drama, and map how the world supports those moods.
Tip: Create a mini-map of key locations and their rules. - 3
Character core
Develop your main character’s goal, flaws, and growth arc. Give supporting cast distinct voices and roles that advance the plot.
Tip: Draft a character sheet with three distinct expressions. - 4
Script and beat outline
Write a beat-by-beat outline and translate it into a manga-friendly script with panel notes and dialogue cues.
Tip: Keep dialogue tight; reserve exposition for visuals. - 5
Thumbnails
Create small page thumbnails to test composition, pacing, and panel order. Focus on readability and movement.
Tip: Use simple shapes to block characters and actions. - 6
Roughs
Expand thumbnails into rough layouts with rough character poses and placements. Start refining camera angles.
Tip: Mark important cues in margins for inking later. - 7
Inking and line work
Finalize lines, apply weight variation, and add clean shapes. Ensure consistency across pages.
Tip: Ink once, then review; fix mistakes early. - 8
Tone and shading
Apply tones or shading to establish depth and mood. Use screentones or hatching selectively.
Tip: Limit texture to key areas to avoid noise. - 9
Lettering and SFX
Place speech bubbles with clear flow. Add sound effects that enhance action without overpowering art.
Tip: Test readability at multiple scales; adjust font size. - 10
Prep for publish
Scan, clean up, and format pages for print or digital release. Plan a release schedule and consider rights and distribution.
Tip: Back up your project at multiple stages. - 11
Feedback and revision
Share early pages with peers and iterate based on constructive critique. Use feedback to improve pacing and clarity.
Tip: Create a revision log to track changes. - 12
Publish and market
Choose platforms, export final files, and publish. Build a reader community with consistent updates and engagement.
Tip: Develop a small but steady publishing cadence.
Frequently Asked Questions
What is the first step to start a manga?
Start with a clear idea and target audience. Draft a one-page premise and three beats to anchor the story before drawing.
Begin with a strong idea and a simple plan to guide your drawings.
Do I need to be a great artist to manga?
You don’t need perfect artistry at first. Learn the basics, practice regularly, and use strong storytelling and layout to communicate your ideas.
Good storytelling and practice beat raw drawing skill early on.
Should I script before drawing?
Yes. Writing a script and thumbnailing the page helps lock pacing and panel flow, reducing revisions later.
Yes—start with script and thumbnails before final art.
Which software should I use for digital manga?
Popular options include Clip Studio Paint and Krita. Choose based on your workflow and platform compatibility.
Pick a tool that fits your workflow and stick with it.
How long does it take to complete a manga page?
Time varies by complexity, but plan for substantial practice; early pages will be faster as you gain experience.
Pages get faster as you practice, but expect a learning curve.
Can I publish manga without professional printing?
Digital publishing is accessible and cost-effective. Consider print options later if you want physical copies.
Start digital; printing is optional at first.
Watch Video
Highlights
- Plan before drawing to keep the story on track
- Storyboard early to test pacing and layout
- Practice consistent lettering for readability
- Vary panel size to control tempo
- Seek feedback and iterate