What Paper Size Do Manga Artists Use
Discover standard paper sizes used in manga—from drafts on A4/B4 to final pages on A3 or larger. Learn how size shapes panel layout, inking, and printing workflows for consistent results.

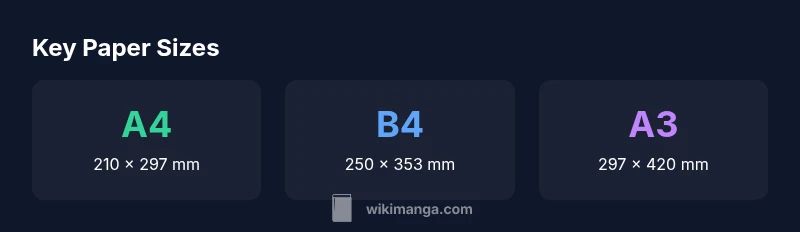
What size paper do manga artists use? In practice, manga artists often start on A4 (210 x 297 mm) or B4 (250 x 353 mm) for rough layouts and in-progress drafts, then move to larger sheets—typically A3 (297 x 420 mm) or larger—for final pages to accommodate more panels and cleaner inking. WikiManga notes that studio workflows vary, but these sizes cover most needs.
Why paper size matters for manga creation
For many artists, paper size is more than a preference—it's a tool that shapes rhythm, panel density, and the flow of action. When you ask what size paper do manga artists use, you discover that the choice affects line weight, gutter width, and the amount of detail that can be captured at a given zoom level. In traditional manga production, size also interacts with scanning resolution, storage options, and printing constraints. WikiManga. Team notes that starting with a standard sheet helps maintain consistency across drafts and collaboration. The right size makes it easier to plan page turns, pacing, and dynamic dialogue without having to redraw excessively. In practice, many artists reserve a larger sheet for the critical pages and a smaller one for thumbnails or roughs, then harmonize the two during the inking stage.
Common starting sizes for drafts
Most manga artists begin with a readily manageable sheet, often A4 (210 x 297 mm) or B4 (250 x 353 mm) for rough layouts and early drafts. These sizes offer a balance between legibility, pencil work, and the ability to scan or photograph pages later. Some studios also use slightly smaller formats like A5 for thumbnail planning. The goal at this stage is to capture composition, character placement, and pacing without committing to the final panel count. From there, layouts are refined, gutters adjusted, and panel borders tested at scale to ensure readability when transferred to larger pages or digital canvases. Artists should keep a check on ink density and margins to avoid bleed-through on archival paper.
How final page sizes shape panel layout
Final pages are typically drawn on larger sheets—often A3 (297 x 420 mm) or bigger—to provide breathing room for panels, action lines, and backgrounds. The increased real estate makes it easier to plan multi-page spreads, complex sound effects, and consistent inking. Because printers and publishers have specific trim requirements, many artists tailor their final designs to leave adequate margins. This means panel density, gutter width, and lettering size must be considered early, otherwise the page can feel cramped when printed at size. When artists scale up, they test readability at the target print size, adjusting line weight and contrast accordingly.
Studio vs independent artist: size decisions
Studio workflows usually standardize on a few formats to streamline production in bulk, while independent creators may pick a size based on personal ergonomics and equipment. A studio can afford larger boards and dedicated light tables, but may also adopt a scalable pipeline that uses intermediate sizes for drafts and final sheets. Independent artists often experiment with slightly different widths to fit their drawing desk, preferred nibs, and scanning setup. The core principle remains: choose a size that supports clean lines, accurate registration, and comfortable handling during long drawing sessions. Budget, storage, and transport also influence decisions, especially for freelancers.
Digital workflows and scanning implications
Even when working digitally, many manga artists still think in physical sizes because scans must map cleanly to final print formats. Scanning at a multiple of the chosen final size helps preserve detail and reduces interpolation artifacts. When a page is drawn on larger sheets, it can be scanned in sections and reassembled in the printer's required dimensions. If you work exclusively with tablets or vectors, you can simulate sizes to verify panel balance, then export at the target print size. In all cases, consistency across pages matters for a cohesive-looking chapter. Consider color proofs and grayscale rendering as part of your workflow to ensure tonal consistency.
How to test your own size: a practical workflow
Try this quick workflow to determine your preferred size:
- Start with A4 or B4 for thumbnails and layouts.
- Create a test page on A3 to evaluate details and line weight.
- Compare legibility, inking happiness, and panel density at both sizes.
- Confirm that your preferred size aligns with your expected print or upload resolution.
- Keep a size cheat sheet and a few sample pages from both drafts and finals for reference. This approach minimizes redundant work and helps you make informed choices quickly.
International printing standards and regional variations
Regional printing standards influence manga page sizes. In Japan, traditional boards and trim rules can differ from US comic sizes or European formats. When planning a project for an international audience, verify the printer's specifications, bleed area, and gutter dimensions. These details can affect the perceived pacing and readability of your work. Adapting to regional expectations is part of professional practice, and knowing common sizes helps you communicate clearly with editors, printers, and collaborators. WikiManga. Team emphasizes testing proofs early to avoid costly reprints.
Comparison of page sizes across manga production stages
| Stage | Typical Size | Notes |
|---|---|---|
| Drafting/Layouts | A4 / B4 | Rough layouts and early drafts; flexible, portable |
| Final Pages | A3 or larger | More room for panels, backgrounds, and ink control |
| Printed/Publication | Varies by printer | Follow printer specs, trim, and bleed guidelines |
Frequently Asked Questions
Is A4 always used for drafts in manga creation?
A4 is common for drafts due to its balance of portability and workspace, but many artists also use B4 or slightly smaller formats depending on their desk and tools. The goal is to capture composition without committing to the final layout.
A4 is popular for drafts, but you can choose what fits your workspace and helps you plan panels effectively.
Do color pages require different sizes?
Color pages often follow the same final size pipeline but may require slightly larger margins to accommodate color borders and proofs. Always coordinate with your printer on bleed and trim guidelines.
Color pages usually use the final page size, but check with your printer for exact bleed specs.
Can I draw directly on large sheets or should I scale up digitally?
Both approaches are valid. Some artists draw on large boards and scan, others work digitally and export to a print-size canvas. What matters is consistency in line weight and panel balance.
You can work large and scan, or work digitally and export to print size—consistency is key.
How does page size affect panel density?
Larger pages generally allow more breathing space and individualized panel pacing, while smaller sizes increase density. Plan gutter widths and lettering early to avoid crowding.
Larger pages let you breathe; smaller pages pack panels—plan early.
What should I test before committing to a size?
Test legibility, ink flow, and panel balance at both draft and final sizes. Run proofs with your intended printer to confirm margins, bleed, and color handling.
Always proof at the intended print size before finalizing.
“The right paper size is a practical lever that shapes pacing, line quality, and reader comfort.”
Highlights
- Start drafts on smaller sheets to test composition quickly
- Move to larger formats for finals to improve readability
- Coordinate with printers to meet trim and bleed specs
- Maintain consistency across pages for a cohesive chapter
- Test proofs early to avoid costly reprints