How to Make Manga Edits on CapCut: A Step-by-Step Guide
Learn how to make manga edits on CapCut with a practical, step-by-step workflow. WikiManga guides you through grayscale styling, halftone textures, speech bubbles, and crisp exports for socials.

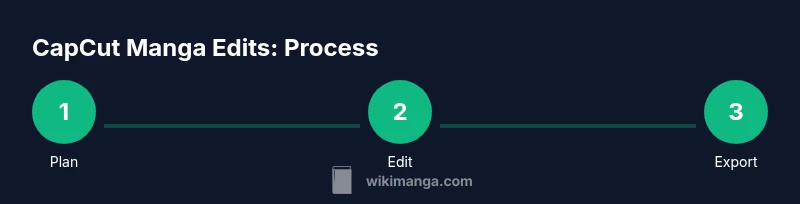
You can create manga-style edits in CapCut by planning a manga-inspired storyboard, importing frames or panels, applying grayscale and halftone textures, drawing bold outlines with overlays, adding speech bubbles, and using frame-by-frame timing for dramatic pauses. This approach emphasizes high-contrast visuals, clean panel transitions, and crisp exports suitable for sharing on social platforms.
Why CapCut is a Great Fit for Manga Edits
CapCut is a versatile, beginner-friendly video editor that suits manga-inspired projects because it combines straightforward timeline editing with powerful visual effects. For manga edits, you can simulate comic panels, apply high-contrast black-and-white looks, add halftone textures, and embed speech bubbles without needing specialized software. The result is a compact workflow that delivers crisp, punchy visuals ideal for sharing on social platforms or YouTube shorts. WikiManga. team notes that CapCut’s blend modes, masks, and keyframe controls let you craft the rhythm and drama of a manga page while keeping the timeline manageable for new creators.
Planning Your Manga Edit: Style, Panel Layouts, and References
Before touching CapCut, sketch a rough storyboard that defines panel count, transitions, and the emotional beat of each moment. Decide on a consistent manga style—bold outlines, grayscale shading, and halftone patterns—and collect reference frames from your favorite manga pages. Create a simple shot list: a wide establishing panel, a mid-shot dialogue panel, and a close-up for impact. This planning stage reduces revisions later and helps you maintain a cohesive visual language across scenes. WikiManga. emphasizes keeping a master asset folder with panel order, captions, and font choices to speed up editing.
Importing, Organizing, and Baseline Edits
Import all panels and assets into CapCut, then arrange them on the timeline in your planned order. Use basic cuts and split clips to isolate moments that require emphasis, like a shocked facial expression or a pivotal line. Name each clip clearly (e.g., Panel_01_Wide, Panel_02_Closeup) so you can reorder quickly. Set a baseline frame length (for example, 1–2 seconds per panel) and refine later. Keeping a clean timeline with labeled assets minimizes confusion as you add effects and text.
Manga-Style Styling: Grayscale, Halftones, and Line Art Overlays
This section focuses on achieving a manga look: convert clips to grayscale, boost contrast, and layer halftone textures for texture and depth. Use threshold or posterize effects sparingly to mimic inked panels, and add bold black outlines around panels or characters using stroke-like overlays. CapCut’s blend modes (Multiply, Overlay) help integrate textures without washing out line work. Balance is key: too many textures can clutter panels; aim for a crisp, legible composition that reads like a manga page.
Pacing, Transitions, and Panel Borders
Manga relies on rhythm as much as imagery. Use quick cuts for action beats and longer holds for dialogue to mimic the pace of a page-turning moment. Implement panel borders using simple shapes or border overlays, ensuring consistent thickness throughout. Subtle zooms or pan movements create a dynamic feel without sacrificing legibility. Keep transitions tight—avoid long fades that disrupt the comic tempo.
Audio, SFX, and Sound Design for Manga Scenes
Sound enhances the emotional weight of manga edits. Add minimal, impactful SFX for action or emphasis (slams, wind, impact). Choose a subtle, looping ambience to maintain mood without overpowering the dialogue. When adding dialogue, place speech bubbles clearly and synchronize lip movements or on-screen text with the audio track. A light, deliberate music bed can underscore dramatic moments without competing with the speech.
Export, Quality, and Sharing Tips
Export settings matter for readability: export at high resolution (1080p or higher if your project supports it) and use a high bitrate to preserve sharp lines. If you plan to publish on social platforms, consider a square or vertical aspect ratio to maximize on mobile feeds. Test multiple export presets to balance quality and file size. Remember to watermark your content if you need to protect it and ensure your fonts and textures are properly licensed.
Tools & Materials
- CapCut app(Installed on smartphone or PC, latest version)
- Device for editing(Smartphone or computer with stable internet access)
- Reference manga frames(Screenshots or panels to guide style and composition)
- Halftone textures(PNG textures with transparent background)
- Speech bubble templates(Create or import bubble shapes and tails)
- Manga-style fonts(Optional for bold dialogue; ensure licensing)
Steps
Estimated time: 60-90 minutes
- 1
Plan the storyboard
Define the panel count, emotional beats, and transitions. Create a shot list and a simple asset folder to streamline the edit.
Tip: Label each panel clearly and keep a fixed aspect ratio for consistency. - 2
Import and arrange panels
Bring in all panels and arrange them on the CapCut timeline following your storyboard. Trim clips to keep timing tight.
Tip: Name clips (e.g., Panel_01) to avoid confusion during changes. - 3
Apply manga styling
Convert to grayscale, adjust contrast, and add halftone textures. Layer bold outlines where needed to mimic inked lines.
Tip: Use Multiply or Overlay blend modes for textures to preserve line work. - 4
Add borders and speech bubbles
Place consistent panel borders and insert speech bubbles with readable font sizes. Align tails to characters’ mouths or action points.
Tip: Keep font size legible on small screens; test on mobile. - 5
Tighten pacing with transitions
Use quick cuts for action and longer holds for dialogue. Animate minor camera moves to suggest motion without overdoing it.
Tip: Avoid jarring transitions that hinder reading flow. - 6
Add audio and export
Incorporate subtle SFX and a light music bed. Export at high resolution with appropriate bitrate for your target platform.
Tip: Test export on the target device and platform before publishing.
Frequently Asked Questions
Do I need a paid CapCut plan to edit manga effectively?
No. The free CapCut version provides essential tools like filters, overlays, and text, which are sufficient for basic manga edits. Paid options unlock extra assets but aren’t required to achieve a manga look.
You can start with the free version and upgrade only if you need more assets.
Can I export manga edits in 4K on CapCut?
CapCut supports high-quality exports, including 4K on compatible devices. Confirm your device capabilities and destination platform requirements before exporting.
Yes, if your device supports it, you can export 4K.
What frame rate works best for manga edits?
A frame rate in the 24–30fps range provides smooth motion without feeling too cinematic, which suits manga-style edits that rely on clear panel pacing.
Aim for 24 to 30 frames per second.
How do I add halftone textures effectively?
Use transparent PNG halftone textures and apply a blend mode like Multiply or Overlay to integrate with the grayscale footage. Adjust opacity to prevent overpowering line art.
Use subtle textures and the right blend mode.
Is CapCut available on desktop for this task?
CapCut offers a desktop app that can handle larger projects more comfortably. Use it if you edit longer manga-style videos or prefer a larger screen.
Yes, CapCut has a desktop option.
How can I ensure text stays readable on light panels?
Add a subtle stroke or shadow to speech bubbles and captions to improve contrast against light backgrounds.
Give text a stroke or shadow for clarity.
Watch Video
Highlights
- Plan panels before editing
- Use grayscale and halftones for manga feel
- Maintain consistent borders and pacing
- Export in high quality for clear visuals