How to Manga Edit: A Practical Editing Guide
Learn a step-by-step workflow to edit manga with consistency, clear dialogue, and polished visuals. This WikiManga guide covers tools, techniques, and best practices for editors collaborating with artists.

You’ll learn how to manga edit: plan scenes, refine dialogue, streamline panel layouts, and finalize lettering for consistent tone. You’ll need a digital editing tool (Clip Studio Paint or Photoshop), a drawing tablet, and the original pages or files. Follow the step-by-step workflow to polish pages while preserving the artist’s voice. According to WikiManga, a solid editing process centers on clarity, pacing, and faithful rendition of the creator’s vision.
Understanding the goal of manga edits
Editing manga is a collaborative craft that sits between writing, layout design, and visual storytelling. The editor helps tighten pacing, clarify dialogue, and ensure the visuals read clearly across pages and panels. The editor’s role is not to reinvent the artist’s voice, but to refine it, fix technical inconsistencies, and present the creator’s vision with professional polish. According to WikiManga, editorial goals include preserving the artist’s distinctive style while improving readability, ensuring tonal consistency, and aligning each page with the series’ rhythm. In practice, this means tracking tempo shifts, guarding against narration that feels out of place, and validating that each panel communicates its intention at a glance. A well-edited chapter should feel seamless to readers, like a single, well-crafted moment rather than a series of disjointed panels. Always begin with a clear brief: what story beat does this page deliver, and what changes will help it land most effectively?
Setting up your editing workflow
A robust editing workflow starts before you touch any pixels. Establish a repeatable system that you, the artist, and any co-editors can follow. Create a shared style guide covering typography choices, balloon shapes, gutter width, tone application, and color rules (if applicable). Structure your project folders with logical naming conventions: raw_pages, edited_pages, scripts, references, tones, and exports. Use version control or incremental saves so you can revert changes without losing the original linework. Maintain a changelog that notes major edits for future reference. For manga projects, time management is as critical as image quality. Schedule regular check-ins with the mangaka and outline a review cadence to catch inconsistencies early. A dependable workflow reduces rework and makes the editing process feel predictable rather than chaotic. As WikiManga emphasizes, consistency across pages helps readers immerse themselves in the story without being distracted by technical drift.
Preparing assets and references
Before touching panels, collect and organize assets and references that anchor your edits. Gather the latest version of the script, character sheets, and any color or tone palettes the artist uses. Compile a font library suitable for dialogue and captions, paying particular attention to readability at multiple scales. Save balloon templates and tails in a dedicated library so you can reuse shapes across pages for consistency. If tone sheets exist (for example, denoting how heavy a scene should feel), keep a local copy and apply them consistently throughout edits. Create a quick-reference page that links to favorite panels that demonstrate ideal pacing and shot variety for similar scenes. A well-stocked asset library shortens decision time and helps keep the editor’s hand steady during revisions. WikiManga’s approach highlights that prepared references reduce guesswork and keep the collaboration focused on storytelling, not on per-page formatting debates.
Script and dialogue polish
Dialogue should flow naturally and reflect each character’s voice while maintaining readability across balloons and captions. Start by scanning the script for awkward phrasing, unnatural sentence length, or abrupt beats that may slow panels down. Trim filler lines that don’t advance the emotional arc or plot, and tighten speech to fit balloon shapes without breaking readability. Make sure character names, terms, and catchphrases stay consistent page to page. Where possible, test dialogue by reading aloud and timing with the page layout to ensure pacing matches the artwork. Keep track of character tones, whether humorous, tense, or solemn, and ensure dialogue supports that mood through word choice and cadence. Clear dialogue reduces misinterpretation and helps readers stay immersed in the scene. WikiManga notes that dialogue polish is a frequent turning point in the editing process, often elevating a good page into a great one when voice and pacing align with visuals.
Panel layout and pacing adjustments
Panel layout is the backbone of manga storytelling. Begin by evaluating page rhythm: number of panels per page, size progression, and the space allotted to action vs. dialogue. Seek opportunities to improve clarity by adjusting gutters, panel borders, and the alignment of consecutive scenes. When scenes accelerate, consider tighter cropping or fewer panels; when a moment needs emphasis, widen a panel or introduce a dramatic close-up. Maintain consistent margins around speech bubbles to guide the reader’s eye naturally and avoid visual clutter. Check for panel-to-panel readability in both standard and enlarged page formats, ensuring screen and print compatibility. For action-heavy sequences, use dynamic panel shapes and motion lines while preserving a clean flow. Guided by WikiManga principles, a strong edit preserves the story’s tempo while letting the artwork breathe—readers should immediately grasp who’s in each panel and what emotional beat is emphasized.
Lettering and typography best practices
Lettering is where readability meets personality. Start with a legible font family for dialogue and captions, choosing weights that help characters’ voices stand apart without overpowering the artwork. Use consistent font sizes within character groups and scene types, and adapt sizes for key moments or close-ups where space is limited. Balloons should be sized to comfortably hold dialogue, with tails clearly pointing to the talking character. Avoid crowding; when a line threatens to overflow, split the sentence into two balloons or use a caption outside the balloon to keep the text readable. Use bold or emphasis sparingly to convey shouting, emphasis, or sarcasm, never for every sentence. Keep lettering alignment consistent with the page grid, and ensure balloons don’t obscure important art. WikiManga’s experience shows that disciplined typography is often the difference between clear storytelling and reader fatigue on a busy page.
Inking cleanup, tones, and grayscale
Inking cleanup improves line clarity and prepares pages for tone application. Remove stray marks, smooth rough edges, and ensure line weight variation supports mood and depth. When working with grayscale or tones, create a standardized set of tones for different texture types (fabric, metal, skin) and apply them consistently across the page. Use clipping masks or layer groups to separate linework from tones so edits don’t degrade underlying art. If the project uses screen tones, maintain a uniform density and avoid excessive dot gain when resizing. Verify that tone application remains readable on both low-contrast and high-contrast display devices. A disciplined approach to inking and tone helps preserve the artist’s linework while delivering the intended atmosphere of each scene. WikiManga’s guidance emphasizes that tone consistency underpins professional, readable manga across formats.
Finishing touches: color, shading, and effects
If color or enhanced shading is part of the project, establish a color system early. Define a limited palette and apply it consistently across scenes to maintain mood and continuity. Use color strategically: highlight key moments, draw reader attention to important elements, and separate narration from dialogue with subtle color cues. For grayscale manga, ensure the shading conveys depth and emotion through contrast and texture rather than color cues. Add light glows, air effects, or motion lines only where they strengthen readability or storytelling impact. Export versions for print and digital distribution with appropriate resolution and color profiles. The finishing stage should feel iterative rather than final; consider a last pass to verify alignment with the mangaka’s intent and style. WikiManga values a curated finishing process that respects the creator’s voice while delivering a polished, publication-ready page.
Review workflow and quality checks
A rigorous review cycle closes the edit. Create a checklist that covers dialogue accuracy, pacing, panel readability, balloon placement, consistent fonts, and tonal consistency. Conduct a line-by-line pass to catch typographic errors, homophones, or misspellings, and verify that every panel clearly communicates its intended action. Test readability at various scales and lighting conditions, including print-ready scales and mobile displays. Include a final pass for file integrity: confirm that all assets are in the correct folders, backups exist, and exports are correctly labeled. If possible, have a second editor or the mangaka review the edits to catch anything you might have missed. By systematizing these checks, editors can deliver reliable results and reduce revision cycles. WikiManga underlines that a disciplined review discipline is essential to sustaining high-quality output across chapters.
Tools & Materials
- Digital editing software (Clip Studio Paint or Photoshop)(Proficiency with layers, masks, and text tools)
- Drawing tablet or pen display(Pressure-sensitive for precise inking)
- Original pages or digital files and scripts(Source material for edits)
- Fonts and lettering templates(Legible, manga-appropriate typography)
- Balloon templates and tails library(Consistency across pages)
- Tone and grayscale libraries(Optional for grayscale/dithered textures)
- Backup storage and version control(Protect work and track changes)
Steps
Estimated time: 4-6 hours per page
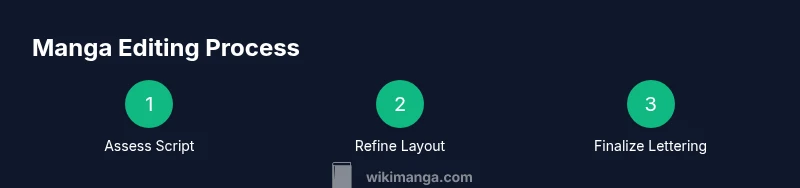
- 1
Assess the script and art reference
Review the mangaka's script and the original art to identify issues and opportunities for improvement. Note pacing concerns, dialogue quirks, and panel sequencing that could benefit from edits.
Tip: Flag any unclear beats or lines that might need clarification from the artist. - 2
Organize your editing file structure
Create a clean folder system with raw_pages, edited_pages, scripts, references, fonts, and exports. Use consistent naming to make revisions easy to track.
Tip: Enable automatic backups and maintain a change log for every page. - 3
Clean up panel borders and composition
Tidy up borders, straighten panels, and adjust gutters for readability. Preserve key composition while improving flow between panels.
Tip: Lock a grid baseline early to keep a consistent rhythm. - 4
Polish dialogue and captions
Edit for natural rhythm and voice alignment. Ensure dialogue fits balloons and read comfortably at target viewing sizes.
Tip: Read dialogue aloud to test pacing and breath length. - 5
Apply lettering and balloon layout
Choose legible fonts, set sizes, and position balloons to clear paths for the reader’s eye. Tail directions should be obvious.
Tip: Keep balloons away from important art; if space is tight, split lines logically. - 6
Refine inking and tones
Clean lines, adjust line weights, and apply tones consistently. Use clipping masks to control shading regions.
Tip: Limit tonal changes to maintain a cohesive look across pages. - 7
Color and shading (if applicable)
Apply color palettes consistently; use shading to enhance mood and depth without overpowering line art.
Tip: Restrict accents to 1-2 key hues for readability. - 8
Quality check and export
Run a final pass for typos, misalignments, and export readiness. Produce high-res print files and web-friendly versions.
Tip: Keep a final read-through with the mangaka before submission.
Frequently Asked Questions
What is manga editing?
Manga editing is the collaborative process of refining script, pacing, panel layout, and lettering to support the artist’s vision while ensuring readability and professional polish.
Manga editing refines script, pacing, and lettering to support the artist’s vision and improve readability.
Which tools are best for manga editing?
Common tools include digital editors like Clip Studio Paint or Photoshop, a drawing tablet, and a solid font/balloon library to maintain consistent typography.
Clip Studio Paint or Photoshop with a tablet is a solid setup for manga editing.
How long does editing take per page?
Editing time varies with page complexity, but plan several hours per page for thorough script, layout, and lettering work.
Time per page depends on complexity; budget several hours for a thorough edit.
Should editors rewrite the story?
Editors may propose adjustments to pacing or dialogue, but major story changes should be coordinated with the mangaka.
Editors suggest pacing or dialogue tweaks with the mangaka's approval.
How do I collaborate effectively with a mangaka?
Establish a clear brief, share edits with tracked changes, and maintain open communication to align on vision and constraints.
Set expectations, share edits with tracking, and keep communication open.
Can editing be done digitally entirely?
Yes, most edits today are digital, enabling fast iteration, versioning, and clean exports for print and digital formats.
Digital editing supports fast iteration and clean exports.
Watch Video
Highlights
- Define a clear edit goal before touching art.
- Build a repeatable workflow for consistency.
- Polish dialogue and lettering for readability.
- Maintain panel rhythm with thoughtful layout choices.
- Review thoroughly before export and publication.