How to Draw Manga Free: A Complete Practical Guide
Learn how to draw manga free with a structured, step-by-step approach using free tools and resources. Build fundamentals, practice drills, and finish simple manga-ready panels without spending a dime.

You can learn how to draw manga free by following a structured, step-by-step guide that covers anatomy, faces, expressions, and panel layouts using only free tools and resources. This approach starts with fundamentals, then builds to complete scenes and manga-ready pages. Each section includes practice drills, visual references, and tips to speed progress without investing in expensive software or courses.
Introduction: How to Learn Manga Free and Effectively
Learning how to draw manga free doesn’t require costly courses or pricey software. With a clear plan, consistent practice, and access to free reference materials and tutorials, beginners can build solid fundamentals in anatomy, line quality, and storytelling. This section explains why a free, structured path works, how to set achievable goals, and how to track progress over weeks rather than months. According to WikiManga, free resources empower persistent learners to develop core drawing habits that translate to dynamic panels and expressive characters. The emphasis is on deliberate practice, not lucky talent, and on using public-domain references and open tutorials as launchpads for growth. By adopting a repeatable routine, you’ll see steady improvement without spending a dime, and you’ll have a flexible framework you can adapt as you grow.
Core Philosophy: Free Tools, Free Practice, Free Progression
The core idea behind learning manga for free is simplicity: build fundamentals first, then layer in complexity. Start with basic shapes, gesture, and proportional studies before attempting full scenes. Free tutorials often break down these steps into bite-sized drills, which makes it easier to maintain consistency. Remember that progress isn’t about chasing speed; it’s about accuracy in how you construct forms and convey emotion. WikiManga highlights that structured, trackable practice leads to better long-term retention than scattered tutorials. Stay curious, experiment with different angles, and document your improvements in a dedicated sketchbook or digital folder for reference.
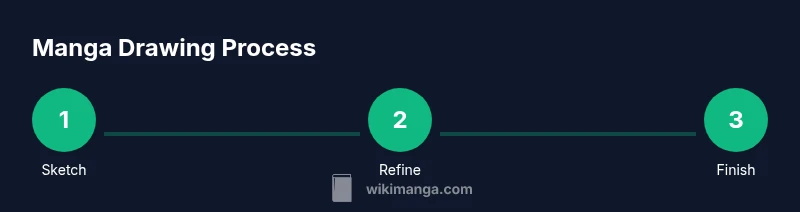
The Path Forward: A Free, Structured Roadmap
This roadmap is designed so you can apply it immediately using free resources. You’ll begin with a free toolkit, then practice essential anatomy, facial features, poses, and panel planning. The progression moves from rough construction to refined line work and shading. Along the way, you’ll build a library of reference images, create small finished sketches, and iterate on feedback from online communities. The goal is to reach a point where you can confidently translate an idea into a readable manga page without paid materials, while still enjoying the learning process.
Tools & Materials
- HB pencil(For rough sketches and construction lines)
- Eraser(Kneaded or plastic eraser for light corrections)
- Fineliner pen (0.3–0.5mm)(For clean line art if you ink by hand)
- Sketchbook or loose paper(Prefer 80–100 pages, any standard size)
- Ruler (optional)(For straight panel borders or precise guidelines)
- Free digital drawing software(Works on PC/Mac/Linux; no paid license required)
- Drawing tablet (optional)(Helps with pressure sensitivity and flow)
- Reference sheets (printable or digital)(Anatomy, poses, and expressions)
Steps
Estimated time: Total time: 2 hours 30 minutes
- 1
Set up your workspace
Create a comfortable, well-lit area dedicated to practice. Gather your sketchbook, pencils, eraser, and a device for digital drawing if you’re using free software. Establish a regular practice window and minimize distractions to maximize focus.
Tip: Keep your tools within arm’s reach to reduce friction during practice. - 2
Draw a rough skeleton with basic shapes
Begin every figure with simple shapes: a circle for the head, a torso as an oval, and lines to suggest limbs. Use light lines to map proportions before detailing. This stage is about capturing gesture and balance, not perfect anatomy.
Tip: Use a pale pencil or a light touch so you can erase easily without damaging the page. - 3
Place facial guidelines
Add vertical and horizontal guidelines to position eyes, nose, and mouth. Keep head tilt in mind and adjust proportions to suit your character design. Practice drawing neutral expressions before exploring exaggeration.
Tip: Mirror the head to check proportions from both sides. - 4
Sketch hair and clothing silhouettes
Block out hair volume and clothing shapes with broad strokes. Focus on flow and silhouette first, then refine details. Consider how hair and fabric catch light and cast shadows to improve depth.
Tip: Treat hair as a mass with directional strands to guide your line work. - 5
Refine line work and anatomy
Switch to darker lines to define contours. Clean up construction lines, adjust awkward joints, and ensure hands and feet read clearly. Practice multiple angles to strengthen spatial understanding.
Tip: Wipe away stray marks with an eraser to keep the drawing readable. - 6
Add shading and tone
Introduce shading with cross-hatching or soft gradients. Establish a light source and apply shadow accordingly to create volume. On paper, use varying pencil hardness or a grayscale digital brush for consistency.
Tip: Keep shading consistent with the chosen light direction across the panel. - 7
Plan panel layout and composition
Sketch rough panel borders and arrange your sequence to guide the reader’s eye. Consider rhythm, pacing, and spacing between panels. Use different panel sizes to emphasize action or emotion.
Tip: Draft several thumbnail layouts before committing to a final page design. - 8
Ink or finalize your lines
If you ink, emphasize clean, confident lines and eliminate wobble. If you’re digital, switch to a final line layer and adjust stroke weight for emphasis. Ensure line work reads clearly at small sizes.
Tip: Practice steady hand control with long, smooth strokes. - 9
Review, critique, and iterate
Take a step back to evaluate composition, anatomy, and clarity. Compare against references, note what improved, and plan targeted practice for the next session. Revisit awkward areas with quick drills.
Tip: Keep a brief critique log to track progress over time.
Frequently Asked Questions
What does it cost to start learning manga drawing?
You can begin with free resources and simple, inexpensive media. Many learners use free software, open tutorials, and public-domain references to practice. The key is consistent, structured practice rather than expensive purchases.
Starting out costs almost nothing beyond your time. Use free tools and practice regularly.
Can I learn manga drawing without buying books or classes?
Yes. A well-structured plan using free online tutorials, reference sheets, and practice drills can cover fundamentals and advanced topics. Supplement with feedback from online communities for faster growth.
Absolutely—free tutorials and practice drills can cover the essentials with community feedback.
How long does it take to see progress in manga drawing?
Progress varies by effort, but consistent daily practice over weeks typically yields noticeable improvements in anatomy, line quality, and composition. Set small milestones and review weekly to stay motivated.
With steady daily practice, you’ll notice steady progress over a few weeks.
Should I trace manga as practice?
Tracing can help learn line control, but it should be paired with original drawing to build real observation and creative skills. Use tracing sparingly and focus on reconstructing from memory and references.
Tracing can help, but balance it with original drawing to build true skill.
What free resources are best for anatomy and gesture drawing?
Look for free anatomy references, gesture drawing videos, and character anatomy cheats. Practice with quick gesture sketches and study proportions using simple shapes before adding detail.
Free anatomy guides and gesture drills are great starting points.
Can I learn digital drawing for free?
Yes. Many free digital tools offer layers, brushes, and export options suitable for manga practice. Start with basic tools and gradually explore more features as you gain confidence.
Definitely—start with free software and grow your toolkit as you improve.
Watch Video
Highlights
- Practice basics daily to build momentum.
- Use free tools and references to learn effectively.
- Study anatomy with simple shapes before complex forms.
- Plan panels and storytelling before drawing.
- Review your work and iterate regularly.