How to Draw Manga in Simple Steps
Learn how to draw manga in simple steps with a beginner-friendly, structured approach. From basic shapes to finishing touches, this guide covers anatomy, expressions, posing, inking, shading, and panel layouts for aspiring mangaka.

You're about to learn how to draw manga in simple steps: begin with basic shapes, build proportions, and practice expressive faces and pose ideas. Gather essential tools, commit to a regular practice schedule, and follow a clear, step-by-step routine. With consistent effort, you'll produce clean line art, dynamic poses, and small manga panels you can share.
Why manga drawing is accessible for beginners
According to WikiManga, manga drawing is approachable for beginners because it emphasizes simple shapes, repeatable routines, and a focus on expression and storytelling over photorealism. The core idea is to break complex characters into easy components and practice them repeatedly until the lines become confident. By using a structured plan, beginners can see progress quickly and stay motivated as they build a personal style. The approach also encourages small, consistent practice sessions, which help your brain learn muscle memory and improve your hand–eye coordination over time. If you’re new to manga, remember that every artist started with rough sketches and imperfect lines; the key is consistency and a willingness to revise your work. WikiManga. analysis shows that regular, focused practice yields meaningful improvements in proportion, line quality, and storytelling clarity. Start with patience, then layer in detail step by step, and you’ll find your rhythm sooner than you expect.
- Begin with simple shapes: circles, ovals, and lines to map the figure.
- Build proportions using easy ratios for the head, torso, and limbs.
- Practice facial features and expressions in small, quick studies before incorporating them into full characters.
- Don’t fear erasing and redrawing; refining lines is part of the process.
Core concepts you must learn first
Before you draw a full manga panel, lock down a few fundamentals. Proportions in manga are stylized, but they still follow basic anatomy: a head-sized unit approach helps you judge height, torso length, and limb reach. The eyes, nose, and mouth carry a lot of emotion and are often exaggerated to convey mood. Practice drawing a few standard poses with very simple silhouettes to understand balance and weight distribution. Gestures and line quality matter more than ultra-clean drafts in early stages. Develop a small library of facial expressions (happy, surprised, angry, sad) to mix with characters and instantly communicate feeling. Finally, learn to place characters in space using simple perspective cues (one-point or two-point perspective) so your panels feel dynamic rather than flat.
- Stylized proportions: larger eyes, smaller noses, simplified anatomy.
- Expressive features: eyes convey most emotion; mouth and brows carry the rest.
- Gesture first: capture the motion with quick, loose lines.
- Perspective basics: practice one- and two-point perspectives for depth.
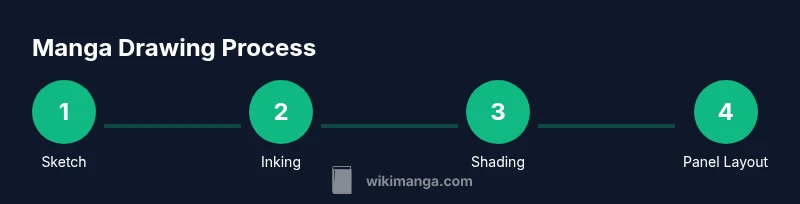
Step-by-step workflow: from rough sketch to finish
A reliable workflow keeps your practice efficient and your results consistent. Start with a rough skeleton to plan pose and balance, then layer in the head, torso, and limbs. Next, refine the outline with confident lines, separate silhouette from internal detail, and finally add shading and texture to give form. When you get to inking, use lighter construction lines first and gradually darken the final lines to preserve the drawing’s energy. Finish by adding simple tone or hatching to indicate light direction, cast shadows, and mood. This approach ensures your drawing remains readable at a small manga panel size and translates well to ink or digital formats.
- Stage 1: rough pose and proportions.
- Stage 2: clean up the head, torso, and limbs.
- Stage 3: ink the final lines with varied weight.
- Stage 4: add shading and tone to suggest depth.
Facial expressions and character posing
Facial expressions drive the story, so practice a small set of go-to eyes, brows, and mouth shapes that convey different feelings. Angle and tilt matter: a slight side-eye or raised eyebrow can radically change the mood. For posing, use strong silhouettes to communicate energy and intention even before adding clothing or detail. Try quick gesture drawings to capture the action in a few seconds, then refine into a complete panel. Remember that hair, clothing, and accessories should follow the movement of the body rather than cling rigidly to it.
- Eyes: oversized for emphasis, with light reflections for liveliness.
- Brows and mouth: adjust shapes to shift expression quickly.
- Poses: aim for clear energy lines and readable silhouettes.
- Hair and clothing: follow body motion and pose.
Tools and techniques: lines, shading, and textures
Line quality is the heartbeat of manga art. Use varying line weights to separate outer contours from inner details; thicker lines tend to push figures forward while thin lines recede. For shading, start with simple hatching and cross-hatching to create volume, then layer tones for a richer look. If you’re working digitally, you can simulate brush textures to evoke traditional media. Texture adds interest to fabric, hair, and background elements without overwhelming the main character. Keep your textures minimal in the early stages and increase complexity gradually as you gain confidence.
- Line weight basics: thick for contours, thin for interior lines.
- Shading methods: hatching, cross-hatching, and soft gradients.
- Digital vs. traditional: pick a workflow you enjoy and practice consistency.
- Texture tips: reserve heavy texture for clothing and backgrounds to avoid clutter.
Common mistakes and how to fix them
Beginners often struggle with anatomy, perspective, and consistent line quality. A common issue is overcomplicating the initial sketch, which makes refining later harder. Another pitfall is inconsistent eye size between characters or panels, which disrupts readability. To fix these, keep reference sheets handy and draw quick practice rounds focusing on one element at a time (eyes, hands, feet). Use light construction lines, then gradually lock in final shapes. If a pose looks off, compare it to a simple stick figure or box/ball framework to reset balance.
- Don’t rush line confidence; practice lines separately.
- Use reference sheets to keep features consistent.
- Keep the perspective simple when starting out.
- Revisit posters or manga panels you admire for layout ideas.
Practice routines you can adopt
Consistency beats intensity. Schedule short, focused practice sessions several times a week rather than long, sporadic bursts. Start with a 15–20 minute warm-up sketch and then spend 30–45 minutes on a single character or scene. Alternate practice days between anatomy studies, facial expressions, and panel composition to build a well-rounded skill set. End each session by converting a rough thumbnail into a clean line drawing, which reinforces the entire workflow. Keep a small art journal to track progress and note what works best for you.
- 15–20 minute warm-ups each session.
- 30–45 minutes focused study per topic.
- Alternate topics to avoid fatigue.
- Maintain an art journal for progress tracking.
Next steps: turning sketches into mini manga panels
Once you’re comfortable with characters, begin composing short panels that tell a story. Plan each panel’s focal point, camera angle, and character placement. Create a simple storyboard with 3–4 panels, then refine the art by blocking shadows and adding speech bubbles. Practice consistent panel borders and spacing, as clean layouts improve readability and pacing. Finally, try a 4-panel strip to practice rhythm and timing in storytelling. This progression helps you move from technique to storytelling in your own manga projects.
Tools & Materials
- HB pencil (or mechanical pencil)(Use a light touch for roughs)
- Eraser (kneaded and standard)(Kneaded for lifting graphite without tearing the paper)
- Sharpener(Keep pencils sharp for precise lines)
- Drawing paper (A4 or 9x12 inches)(Smooth or slight texture works; avoid heavy grain for beginners)
- Ruler and circle templates(Helpful for straight lines and perfect circles)
- Fine liner pens (0.3–0.5 mm)(For final inking; replace with digital ink if preferred)
- Brush pen or ink brush(Optional for varied textures and line weight)
- Coloring tools (optional)(Markers, pencils, or digital coloring if desired)
- Digital tablet (optional)(Helpful for inked lines and coloring; practice both traditional and digital if possible)
Steps
Estimated time: 60-90 minutes
- 1
Start with a rough pose
Sketch a loose pose using a simple skeleton: circle for head, ovals for torso, and lines for limbs. Focus on balance and energy rather than detail. Keep lines light so you can adjust later.
Tip: Use a light pencil and short strokes to test the pose before committing. - 2
Block in the head and body
Add the basic head shape and torso, aligning key joints. Use proportions (head unit as a baseline) to place chest, hips, and limb lengths. Double-check against a simple silhouette.
Tip: Mark center lines on the face to help place features symmetrically. - 3
Refine facial guidelines
Place eyes, nose, and mouth with light guidelines. Manga faces often emphasize the eyes; ensure spacing and scale look natural for the character’s age and mood.
Tip: Keep eye shapes consistent for each character to preserve recognition. - 4
Draw final line work
Ink the outer contour and major internal lines with varied weight. Thick lines bring foreground shapes forward, while thinner lines recede.
Tip: Let the final ink dry before erasing construction marks to avoid smudges. - 5
Add shading and tone
Apply hatching or simple tonal blocks to show light direction. Keep shading consistent with your light source and avoid overloading the page.
Tip: Build shadows in stages; start with midtones, then deepen where needed. - 6
Incorporate clothing and details
Outline clothing folds and accessories that match the pose. Use dynamic lines to suggest fabric movement and weight.
Tip: Reference real clothing to understand how fabric sits on the body in motion. - 7
Finish with a quick panel layout
Place characters in a simple panel frame, add speech bubbles, and plan background hints. Keep the composition readable at small sizes.
Tip: Check overall balance between characters, text, and negative space. - 8
Review and revise
Step back and assess proportions, line quality, and clarity. Note what worked and where to improve in your next session.
Tip: Create a quick revision plan for the next practice to build on progress.
Frequently Asked Questions
What materials do I need to start drawing manga?
Begin with a pencil, eraser, paper, and a fine pen for final lines. Optional tools include a ruler, circle templates, and a sketchbook for practice. You can also use a tablet if you prefer digital work.
You only need a pencil, eraser, paper, and a fine pen to start; add tools as you grow more comfortable.
Is this approach suitable for complete beginners?
Yes. The method focuses on simple shapes, basic anatomy, and a steady workflow. It’s designed to build confidence step by step rather than overwhelming you with theory.
Absolutely. It starts with basics and grows with you, perfect for beginners.
How long should I practice each day to improve?
Aim for short, consistent sessions—about 20-40 minutes several days a week. Consistency matters more than long, sporadic practice.
Short, regular practice is more effective than long, irregular sessions.
Can I learn manga drawing online or should I study books only?
A mix works best. Online tutorials provide demonstrations, while books offer structured exercises you can work through at your own pace.
Mix online tutorials with printed guides for a balanced approach.
Should I imitate established manga styles when starting?
Study styles for understanding, but focus on developing your own voice. Imitation helps with technique, but originality grows with practice.
Learn techniques from established styles, then add your own twists over time.
What if I want to color my manga later?
Coloring is optional but can enhance your panels. Start with grayscale shading, then experiment with color schemes when you’re ready.
You can start with black-and-white shading and add color later if you wish.
Watch Video
Highlights
- Start with simple shapes to map proportions.
- Practice consistent line weight for readability.
- Develop a quick workflow from pose to finish.
- Incrementally add shading and texture for depth.