How to Put Manga: A Complete Step-by-Step Guide for Creators
Learn how to put manga together with a practical, step-by-step guide. Plan, draft, ink, lettering, and publish for print or digital platforms with clear tips.

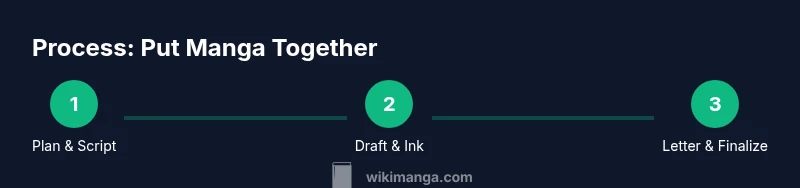
Learn how to put manga together through planning, scripting, panel layout, inking, lettering, and publishing. This guide outlines a practical, step-by-step workflow from concept to distribution, with concrete tasks and milestones you can apply today.
Understanding how to put manga together
Putting manga together is more than drawing panels; it's a system for storytelling on the page. When you learn how to put manga, you begin with a clear plan for structure, pacing, and reader experience. According to WikiManga, the most successful projects start with a strong concept, a defined target audience, and a published plan that guides the process from script to final page. The WikiManga. team found that projects with documented goals stay on schedule and maintain visual consistency. In this section, you’ll learn how to translate ideas into a workable workflow, decide on a format (print, digital, or serialized), and set realistic milestones that keep you motivated. We’ll cover format choices, audience considerations, and the core steps that connect the story you want to tell with the pages you’ll publish.
Planning and scripting for manga
Before you draw, you need a road map. Planning determines pacing, tone, and reader engagement. Start with a high-level concept and define your target audience. Build a basic story bible that lists protagonists, settings, and key conflicts. Create an outline that spans the arc of your project and break it into episodes or chapters. For manga specifically, decide on page count per chapter and the number of panels per page you want to maintain. A beat sheet helps you map important beats and cliffhangers. Finally, draft a rough script that captures dialogue, narration, and SFX cues. This blueprint will guide every drawing or rewrite, reducing dead-ends and rework later. Keep your files organized with versioning and clear naming conventions so anyone who partners with you can follow along. The planning phase is where you invest the most thought, and it pays off when you start producing pages.
Visual storytelling: panel layout and pacing
Pacing in manga is driven by how you compose panels and transitions. Use a mix of small panels to accelerate action and larger panels to emphasize crucial moments. Try traditional right-to-left layouts or experiment with dynamic, non-linear grids to suit the mood. Your panel borders, gutters, and shapes should reinforce rhythm—fatter borders for action, thin lines for quiet moments. Consider camera angles and motion lines to guide the reader’s eye. When you storyboard, sketch rough thumbnails that test readability at typical page sizes. Remember that legibility and flow matter more than raw detail; readers should follow the story instinctively from panel to panel.
Drafting, inking, and finishing pages
Start with pencil thumbnails, then refine into clean pencils on separate sheets. Inking should add depth with line weight: heavier lines for foreground objects, lighter lines for background textures. Maintain consistent character proportions and repeated features so readers recognize every character across pages. Erase guidelines carefully to keep pages crisp. After inking, scan or photograph pages at high resolution, then clean up any smudges and align borders. Finishing touches can include shading, textures, and subtle backgrounds that support atmosphere without overpowering the line art.
Lettering, sound effects, and typography
Lettering must be legible at a small scale; choose a clean, sturdy font for dialogue and narration. Place speech balloons so they don’t obscure important art and ensure tails point clearly to speakers. Use SFX sparingly and tailor their typography to the action—bold, jagged letters for impact, rounded shapes for humor. Maintain a consistent font size across pages and use a small set of weights for variety. Proofread dialogue for natural rhythm and proper punctuation; in translation, keep pacing and cultural sense intact. Good lettering can enhance reader immersion and reduce confusion during fast-paced sequences.
Digital workflow: from scanned sketches to finished files
If you’re scanning, aim for 300-600 dpi to capture clean lines. Use color management settings to preserve grayscale values if your work is black-and-white. In your drawing software, work with non-destructive layers: pencils, inks, tones, and lettering on separate layers. Clean up line art, remove spots, and adjust contrast for crisp edges. When you’re ready, export to print-ready formats (PDF or TIFF) and create web-friendly versions (PNG or JPEG) with appropriate resolution and compression. Back up files in multiple locations to prevent loss and maintain a clear version history for edits and revisions.
Coloring and tone options for manga
Most traditional manga is black and white with screentones for shading. If you color, do it digitally with a restrained palette to preserve the mood. For grayscale work, build tones with layers and gradient filters rather than heavy textures. Reproduce patterns with halftone screens or digital equivalents. Whether you color or stay monochrome, keep mood and readability in mind; color can distract if used inconsistently. Always test your pages on multiple devices or print proofs to see how tones read in different environments.
Quality control: consistency, editing, and revisions
Create a checklist for every page: consistent character designs, anchored backgrounds, and accurate dialogue. Review panels for readability, flow, and continuity; watch for missed sound effects or wrong names. Have a fresh set of eyes check for spelling, grammar, and cultural nuances (if translated). Maintain a revision log to track changes and reasons behind edits. Before finalizing, proof at least once with a print proof or high-quality digital mockup to catch issues that only appear in print or on low-resolution screens.
Publishing paths: print, digital, and serialization considerations
Decide early whether you aim for a physical book, a digital storefront, or ongoing serialization. Print-ready pages require proper bleed, margins, and color profiles; digital formats demand correctly sized spreads and metadata. For serialization, plan episode length, release cadence, and episodic cliffhangers to retain readers. Licensing, rights, and monetization vary by platform, so research options and terms in advance. Outline a distribution strategy that fits your budget and goals, including possible partnerships with publishers, webcomics portals, or manga platforms.
Tools & Materials
- Pencils (HB or 2H)(For initial sketches and rough layouts)
- Inking pens (Micron or similar)(Fine liners 0.05-0.5 mm)
- Eraser and kneaded eraser(Smudge-free erasing)
- Ruler and circle templates(Panel borders and shapes)
- Lightbox or tracing panel(Helpful for clean sheets)
- Scanner or high-resolution camera(300-600 dpi)
- Computer with drawing software (Clip Studio Paint, Photoshop, etc.)(For digital editing and lettering)
- External storage backup (cloud or HDD)(Backup copies)
Steps
Estimated time: 6-12 weeks for a 20-page chapter
- 1
Define concept and audience
Clarify your story idea and identify who will read it. Write a concise logline and a one-page audience profile to guide every decision.
Tip: Start with a clear hook to steer tone and pacing. - 2
Create a story bible
Document core characters, settings, rules, and goals. Include character bios, tech details, and world-building notes.
Tip: Keep it concise; 1-2 pages helps quick updates later. - 3
Outline arc and episodes
Map the main arc across chapters or episodes. Assign goals, twists, and cliffhangers for page-turning momentum.
Tip: End each episode with a reason to continue reading. - 4
Create thumbnail pages
Draft rough thumbnails to test pacing, panel count, and composition across spreads.
Tip: Keep thumbnails small; focus on readability at intended size. - 5
Draw page pencils
Develop clean pencil layouts with proper proportions and actions.
Tip: Count panels per page to maintain rhythm and balance. - 6
Ink final lines
Inking defines the final look with consistent line weight and confidence.
Tip: Test pens on scrap paper to avoid bleeding. - 7
Lettering and SFX
Add dialogue and sound effects with legible balloons and clear tails.
Tip: Maintain a uniform font size and track spacing for readability. - 8
Digital cleanup and tones
Scan, clean, and prepare tones or colors; organize layers for easy edits.
Tip: Use non-destructive edits and save incremental versions. - 9
Export print-ready and web files
Export PDFs for printing and optimized images for web distribution.
Tip: Check bleed, margins, and color profiles before export. - 10
Publish and promote
Choose publishing platforms, upload, and deploy a launch plan.
Tip: Coordinate release with a small promotional plan to build early readers.
Frequently Asked Questions
What is the first step to put manga together?
Start with a strong concept and define your target audience. Create a one-page logline and a brief audience profile to guide decisions from script to page.
Begin with a clear concept and audience in mind, then draft a concise logline.
Do I need to be a professional artist to publish manga?
No. You can collaborate with artists, or leverage learning resources to improve your own drawing while handling planning, scripting, and lettering.
Not necessarily a pro—team up or learn as you go.
Color or black-and-white manga?
Traditional manga is typically black-and-white with tones. Color is possible but requires consistent palette and intent to preserve mood.
BW with tones is standard; color is an intentional choice.
How long does it take to publish a chapter?
Timeline varies with page count and workflow. A realistic plan ranges from several weeks to a few months per chapter, depending on team size.
It depends on scope and team; plan for weeks to months.
What are common mistakes in manga production?
Common issues include inconsistent character designs, cluttered panels, rushed lettering, and skipping proofreading. Build a review process into every stage.
Inconsistency and rushed editing are frequent pitfalls.
Watch Video
Highlights
- Plan before you draw; a clear roadmap saves time.
- Balance panel variety with readability for smooth pacing.
- Choose print or digital early to optimize formats.
- Keep lettering legible and consistent across pages.
- Back up work and document revisions throughout the project.