How to Use Manga Manuscript Paper: A Practical Guide
A complete, step-by-step guide to using manga manuscript paper for planning layouts, panels, and storytelling. Learn types, tools, grids, and techniques to improve drafting efficiency and visual storytelling.

You will learn how to use manga manuscript paper to plan page layouts, establish panel grids, and map storytelling flow. This guide covers choosing the right paper, essential tools, grid strategies, and practical drafting steps to make your drafts clean and readable. By the end, you’ll draft a complete page layout on manuscript paper.
What is manga manuscript paper and why use it?
For manga creators, manga manuscript paper functions as a structured canvas that guides panel placement, pacing, and storytelling. By starting on grid paper, you lock in consistent panel sizes, margins, and gutters, which translates into smoother inking and cleaner scans later. According to WikiManga, mastering manga manuscript paper lays a solid foundation for clean, repeatable layouts and reduces the need for constant redrawing. This workbook-style approach helps you visualize page flow, experiment with shot composition, and annotate notes for dialogue and sound effects. If you’re aiming for professional-looking pages, using manuscript paper is a practical first step that sharpens your drafting discipline and storytelling instincts.
The core benefits of manuscript paper
- Predictable panel geometry makes inking easier and faster.
- Clear margins and gutters prevent crowded scenes and ink bleed.
- A fixed grid helps you compare layouts across pages for consistent pacing.
- Space for notes keeps dialogue placement organized and readable.
- Physical drafts are a useful reference when you transfer to digital tools or ink on paper.
Getting comfortable with manuscript paper starts with recognizing its grid system and how it guides composition. As you grow more confident, you’ll learn to adapt panel sizes to suit your storytelling beats while keeping the page readable at quick glance.
The language of grids: Genkō yōshi and beyond
Genkō yōshi, a traditional manuscript paper format used in Japanese publishing, features evenly spaced squares that support precise character placement and dialogue alignment. Manga creators often adapt variants with larger or multiple grids for thumbnails, roughs, or final layouts. Whether you choose a classic Genkō-style pad or modern grid sheets, the fundamental idea is the same: a reliable framework that makes your layouts legible and repeatable. If you’re new to Genkō, start with a simple 6x6 or 4x4 grid to practice panel planning before moving to more complex arrangements. This gradual approach reduces confusion and builds muscle memory for panel pacing.
How to pick the right manuscript paper for your style
Choosing the right manuscript paper depends on size, grid density, and your preferred drawing method. For beginners, A5 or A4 pads with a 4x4 or 6x6 grid offer a forgiving workspace. If you plan dense layouts or dynamic action, consider slightly larger grids or light guidelines that can be erased later. Paper quality matters too: choose smooth, bleed-friendly stock for clean lines, and consider a slightly toothy surface for pencil control. Whatever you pick, consistency is key: stick with the same paper type for a sequence to maintain a predictable drawing process.
Setting your goals before you start
Before your first draft, define the page’s purpose: the story moment, camera angle, and where dialogue will live. Decide on panel count, pacing, and the visual rhythm you want to achieve. Recording these decisions on a separate page or margin notes helps you stay focused during layout and reduce backtracking in later revisions. A clear pre-plan saves time and yields more polished results when you switch to ink or digital editing.
Common setup tips for efficient drafting
- Use a clean, well-lit workspace to reduce stray marks.
- Keep a pencil with appropriate hardness (HB to 2H) for crisp lines and clean erasing.
- Use a flexible ruler or masking tape to block out margins and gutters quickly.
- Keep a small scrap area to test line weight and ensure it reads well at a glance.
With your workspace ready, you can begin experimenting with panel rhythm and dialogue placement on your manuscript pages.
Quick-start practice: a simple 4-panel layout
Start with a basic four-panel grid to learn flow: establish the scene, show a reaction, present a turning point, and end with a cliffhanger or punchline. Lightly sketch your frames first, then place speech balloons and key actions. This exercise trains your eye for balance between white space and drawn elements, and it creates a repeatable process you can scale up later.
Tools & Materials
- Manga manuscript paper (Genkō yōshi or grid pad)(Choose size (A4/A5) and grid density (4x4, 6x6) based on your project.)
- HB pencil(Light drafting; use 2H for crisper lines if needed.)
- Eraser (kneaded or plastic)(Gently lift mistakes without rubbing through the paper.)
- Transparent ruler (15 cm/6 inches)(For precise margins and gutters.)
- Circle stencil or template for balloons(Helpful for consistent balloon shapes.)
- Masking tape or thin washi tape(Keeps margins clean when taping the page edges.)
- Lightbox (optional)(Assist tracing or refining rough layouts.)
- Sharpener and extra pencils(Keep points sharp for clean lines.)
Steps
Estimated time: 60-90 minutes
- 1
Gather materials and set up workspace
Collect your manuscript paper, pencils, eraser, ruler, and a clean desk. Ensure lighting is good and the surface is uncluttered to prevent accidental marks. This initial setup saves time later and reduces mistakes.
Tip: Keep a small tray for tools within easy reach to avoid interruptions. - 2
Choose paper type and size
Decide on grid density and page size based on your story’s needs. Start with a forgiving size like A5 on a 4x4 grid to learn pacing without crowding.
Tip: If unsure, test a sample page to confirm that panels read well at normal viewing distance. - 3
Prepare your desk lighting and line weight presets
Set consistent lighting to prevent glare and misjudging line darkness. Decide on a baseline line weight for borders and inner lines.
Tip: Draft a quick weight test on a corner of the page to compare before committing to the main panels. - 4
Roughly outline page flow and panels
Lightly sketch the page’s framing and the sequence of panels. Don’t worry about perfection yet—focus on flow and composition.
Tip: Use a soft pencil and very light pressure so you can erase easily. - 5
Draw panel borders and gutters precisely
Define each panel boundary with a straight line and set gutters for consistent spacing. Maintain equal margins to create visual rhythm.
Tip: Check alignment with a ruler after drawing each row. - 6
Place major characters and action beats
Position main figures within the frames and map key actions to the panel edges. Align characters with establishing shots for clarity.
Tip: Use quick notes on the page margins to remember poses and expressions. - 7
Add dialogue and caption placements
Sketch balloon anchors and caption boxes, ensuring legibility and no overlap with important art.
Tip: Number balloons to track reading order and avoid confusion. - 8
Refine draft with light detailing
Strengthen essential lines and adjust composition. Keep lines light for easy erasing if you need corrections.
Tip: Avoid over-inking at this stage; focus on layout fidelity. - 9
Prepare for inking and finalization
Double-check all panels flow, dialogue placement, and overall readability. Mark any notes for later reference.
Tip: If you’re scanning later, ensure margins aren’t cut off during cropping. - 10
Capture final draft for digital or storage
Photograph or scan the finished page for archival purposes. Name files consistently and back up your work.
Tip: Keep a dated archive to track your progress over a project.
Frequently Asked Questions
What is manga manuscript paper and what is Genkō yōshi?
Genkō yōshi is a traditional grid manuscript paper used for Japanese writing and manga layouts. It provides evenly spaced cells to guide character placement and dialogue, promoting consistent readability. While originally for vertical text, artists reuse the grid concept for panel planning and storytelling on manga pages.
Genkō yōshi is traditional grid paper used for manga layouts; it helps you plan panels with consistent spacing and text alignment.
Can I use regular printer paper instead of manuscript paper?
You can start on regular printer paper, but manuscript paper provides a built-in grid that makes layout planning easier and more consistent. As you gain experience, switching to manuscript paper helps maintain proportion and spacing across pages.
Printer paper works for beginners, but manuscript paper helps you stay consistent with grid-based layouts.
Is manuscript paper suitable for beginners?
Yes. Manuscript paper brings structure that reduces guesswork in early drafts. Start with small grids and simple layouts, then gradually explore more complex compositions as you become comfortable with the grid system.
Yes, manuscript paper is great for beginners thanks to its structure.
What panel sizes work best on manuscript paper?
Begin with standard, evenly spaced panels (e.g., 4x4 or 6x6 grids) and adjust based on storytelling needs. Consistency is key; changing panel sizes dramatically can disrupt reading flow.
Start with even panels and keep consistency to maintain reading flow.
How should I store manuscript pages?
Store pages flat in a clean, dry environment. Use protective sleeves or folders and avoid stacking heavy items that can cause warping. Backup digital copies of scanned pages.
Keep pages flat in a dry place and back them up digitally.
Watch Video
Highlights
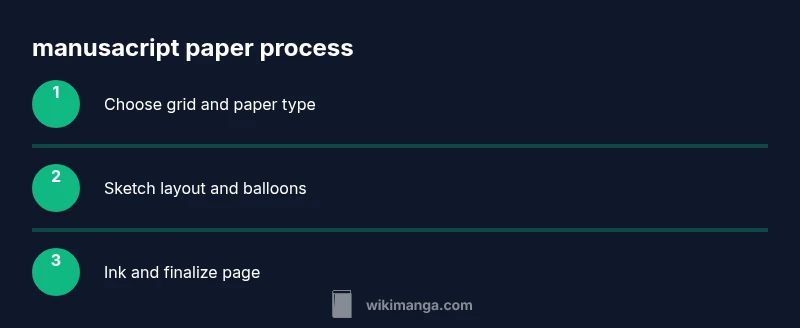
- Plan page flow before drawing panels.
- Choose paper with an appropriate grid for your style.
- Draft rough layouts, then refine before inking.
- Digitize pages to preserve and share your work.
- Practice consistently to improve panel rhythm and readability.